Superstar Face Paint | Petrol Blue 173 - 45gr
10+ In Stock!
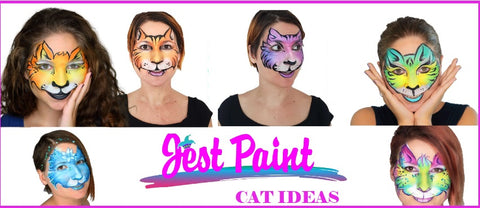

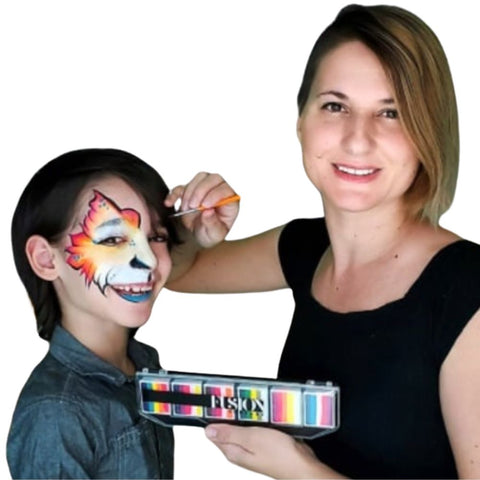
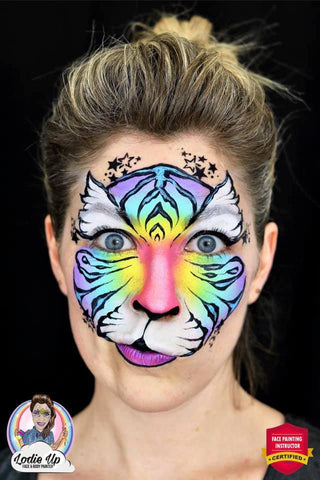
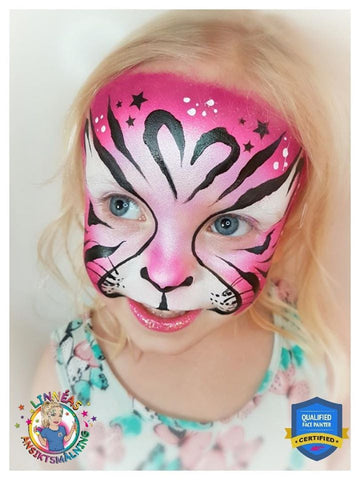
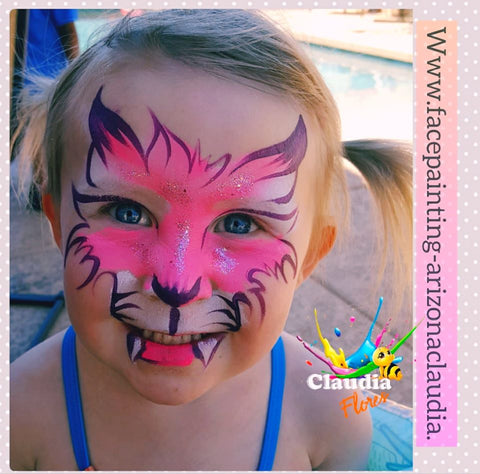
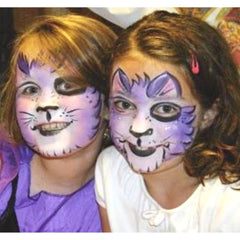
Claudia Flores is a fabulous face painter in Arizona. She painted this bright pink kitty and gave it a wild twist with her sharp almost flame like line work. Don't forget the fangs if you want to make your cat face paint look a little more fierce. I also wanted to mention how much I liked the purple tips on the ears! This is a great way to add more character to your cat face paint.
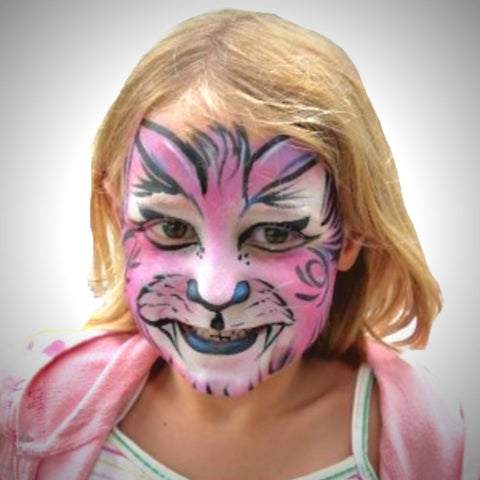
This fun pink can has some twirls and tear drops on the face to add a whimsical style. The little dots by the inner eyes are a cute way to add details to a cat face. I added a little blue on the black nose to soften it up!
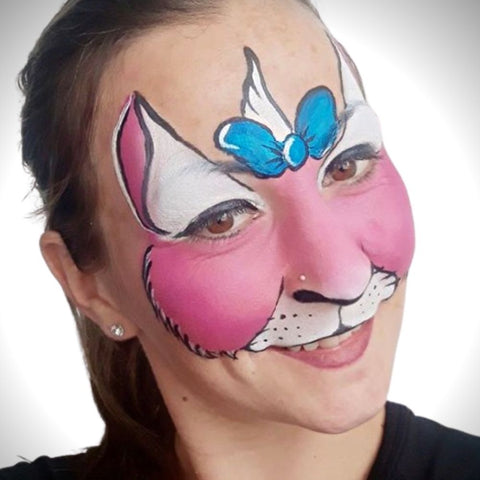
Eva Balogh painted this soft pink cat face paint with a fun blue bow!
The water color technique can be used with face paint. Learn how to paint watercolor style cats, tigers and cheetahs below!
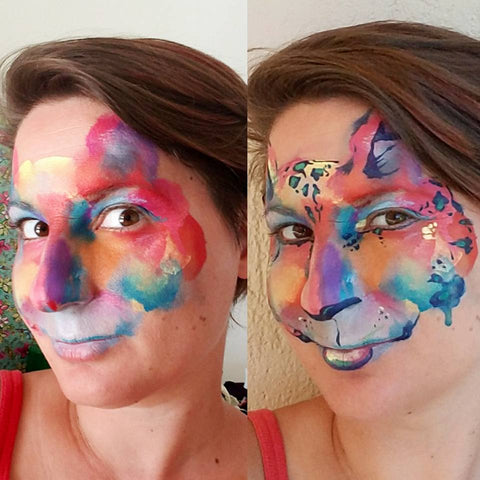
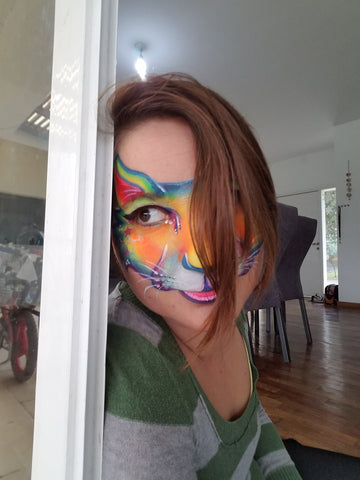
For this simple cat face paint design I used the watercolor effect for the center of the face, lightly applying thinned out face paint in a variety of colors and letting them softly blend into each other. I also added splotches and drips of color. It is an artsy way to face paint, and adults will be sure to love it!
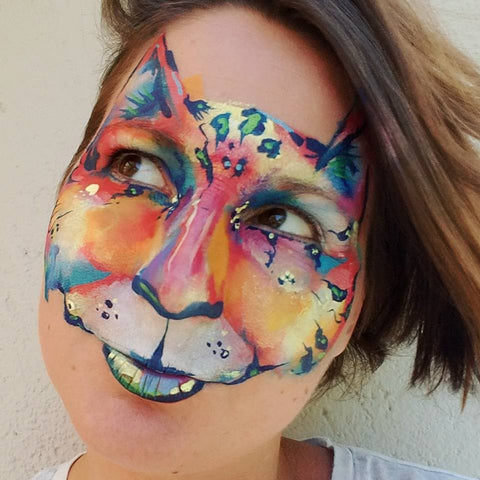
This water color cat face paint design has some cheetah spots with blue centers. Be careful with what colors you put over the eyes and mouth so that they still pop and don't look dark and bruisy. If you need to, sponge a little wet white over the eye area to soften the other colors on the upper lid if you went to dark. Note how the base isn't exactly symmetrical, this creates a more organic natural water color makeup look.
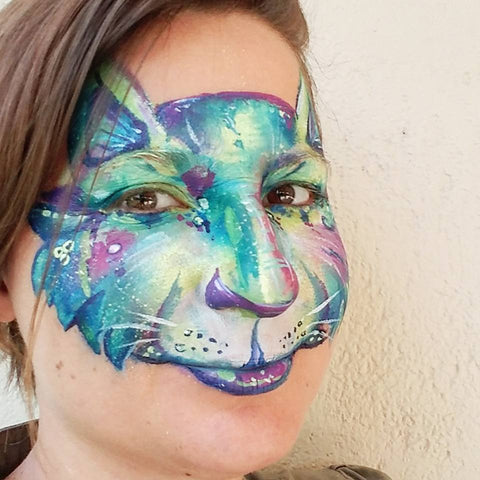
STEP BY STEP WATER COLOR CAT FACE PAINTING VIDEO
This is another example of a water color style cat face paint design with darker colors and lots of drips! You can see a tutorial on how to paint this cat below using professional grade face paint. This water based makeup is perfect for the water color look.

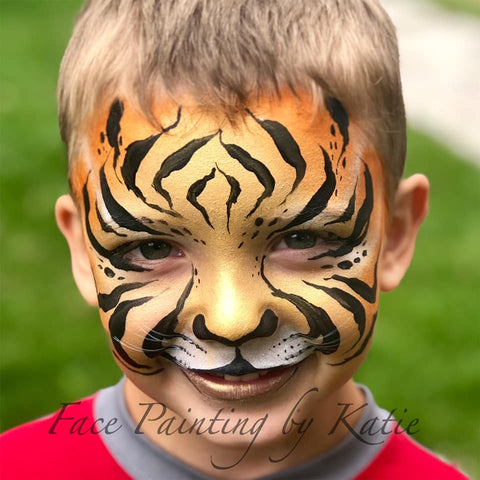
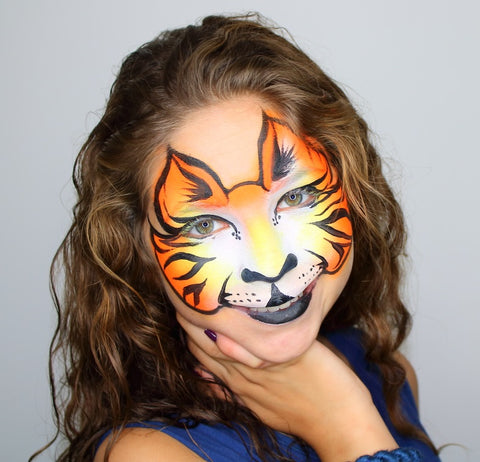
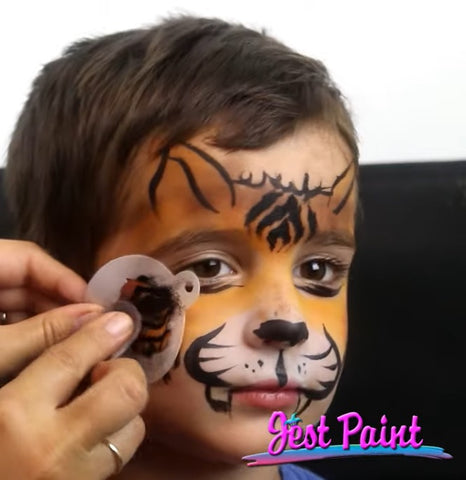
This basic tiger face has bold stripes and markings around the eye! The tiny beard under the bottom lip looks great with a little bit of shaggy line work. Note the dots on the muzzle for the whiskers going from large to small and all angling in but not going all the way over the top lip. This keeps the cat face paint design muzzle in the face painting design clean.
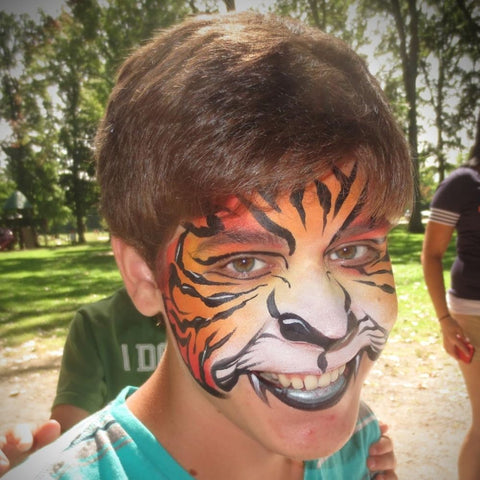
This tiger has a really a bold look with the darker red blended into the orange and those lines up the side of the nose. Every stripe is wiggly and goes from thin to thick and the black eye liner makes it more fierce. I painted the tiger above and the one below, trying to make sure that they looked scary enough for their customers, though I have to say, if you have a good smile it is hard to look scary!
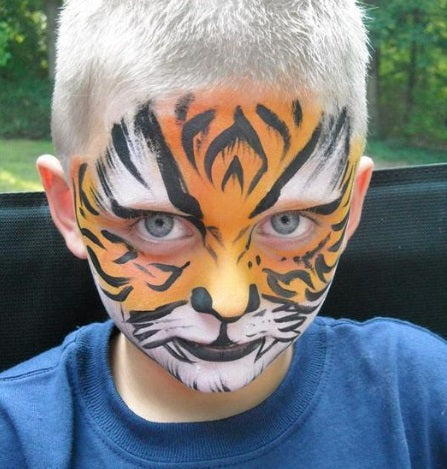
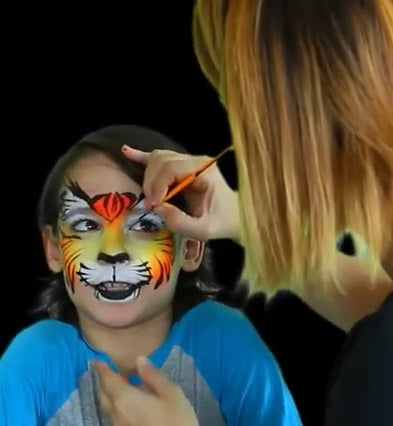
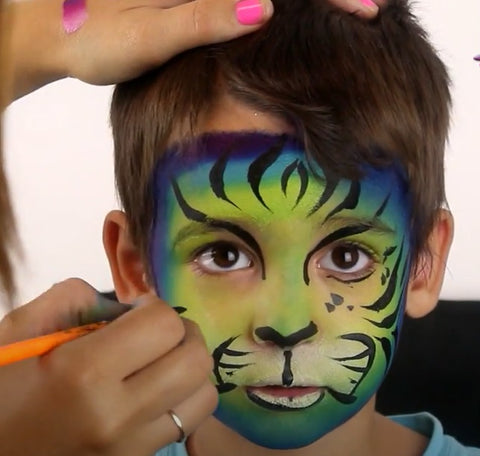
Watch the demo below to see a tiger face paint design on my son. My daughter is in the main image for some reason on the youtube video. In the video I made one mistake in my eyes, which was accidentally joining the outer stripes on the forehead. For the best look they shouldn't touch where they angle on the bridge of the nose. Avoid painting the stripes on the nose or near the lower sides of the nose.
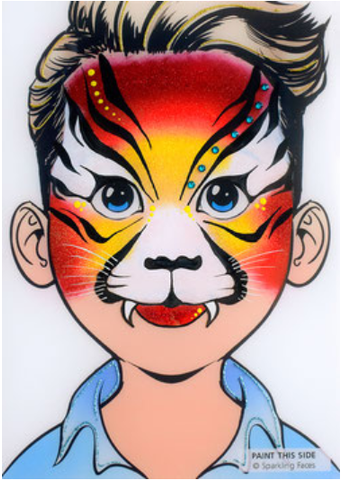
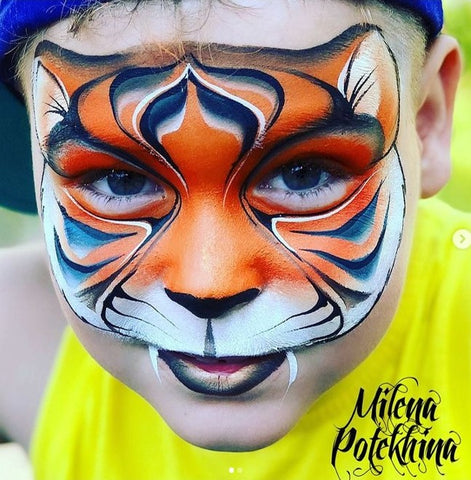
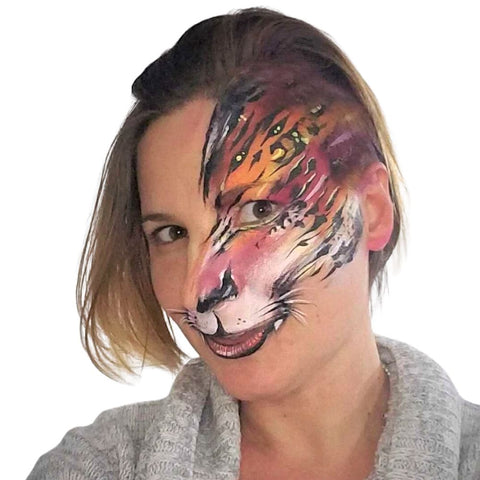
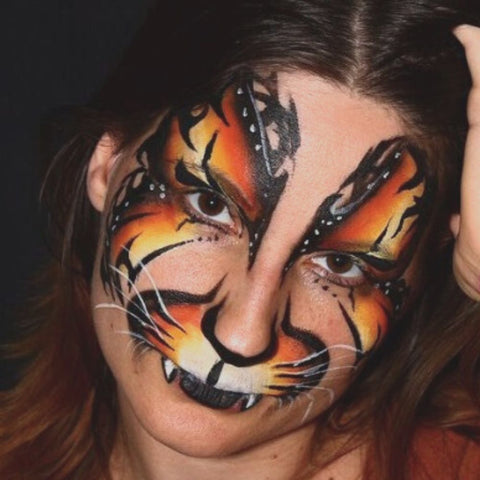
Half face tigers can save time when you have a long line. The burgundy and orange color pattern flows out into the hair line along with the white muzzle and beard and nostril. This, combined with the flow of the black stripes makes a huge impact.
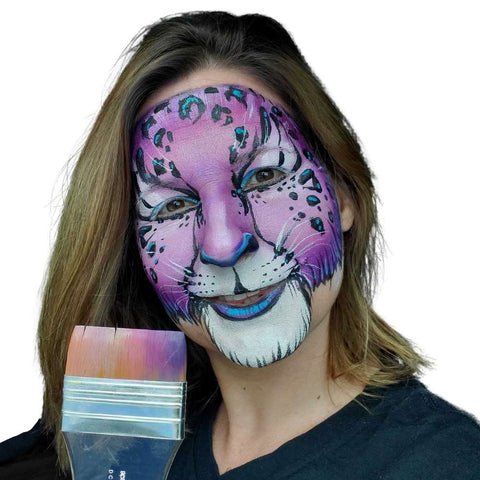
This purple Cheetah cat face paint design has the long lines running from the eyes to the muzzle and lots of black spots highlighted with blue dots. Notice how the large spots are made out of groups of smaller dots and u shapes? I like to make the spots larger on the outer edges and make them smaller and they come into the center of the face. Keep a little space free of dots so that your eyes can settle easier on the design and as to not distort the face too much. I used the BOLT Rainbow Face and Body Brush for this design.
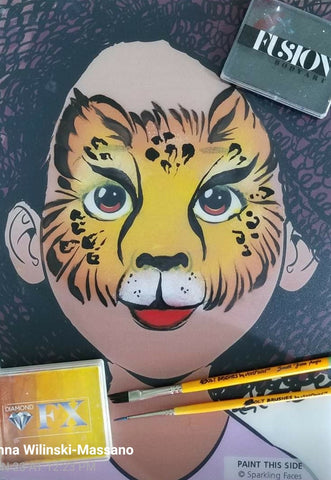
I painted this design for you to be inspired. I used some bolt brushes and the Diamond FX Wild Cheetah cake. Below you will see a 3 minute version and a 30 minute version of the Cheetah cat face paint design can painted on a face. The more time you take the more fur texture you can add and make sure things are symmetrical and neat.
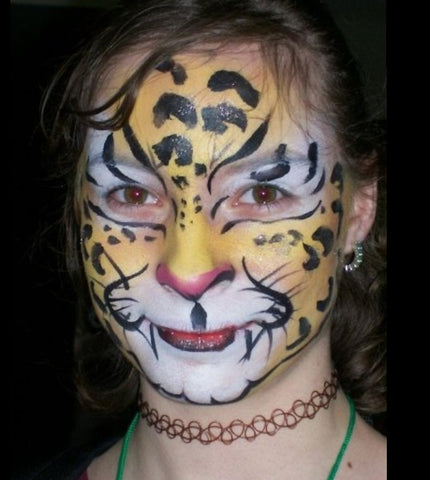
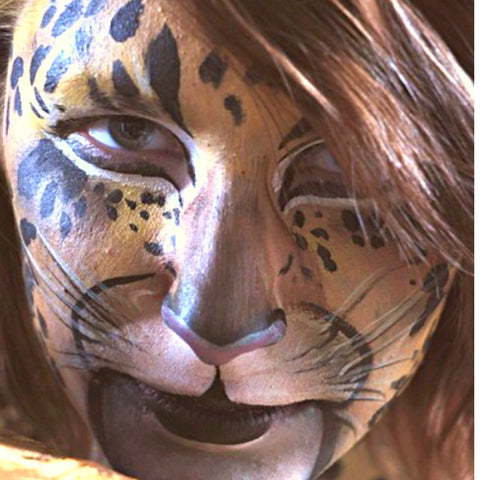
This more realistic cheetah cat face paint design has a lot of fine whiskers, a shaded muzzle and fine hair strokes on the nose painted with a rake brush. I outlined the eyes in black and then again in white. The tip of the nose is a light pink, just like a real cheetah. (Photographer - Steve Brown)
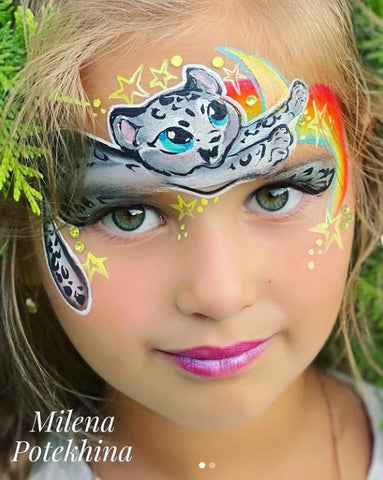
This cute Cheetah cat face paint design was done by Milena using her cute cub stencil. If you struggle with little cheek art faces, this one will be very helpful!
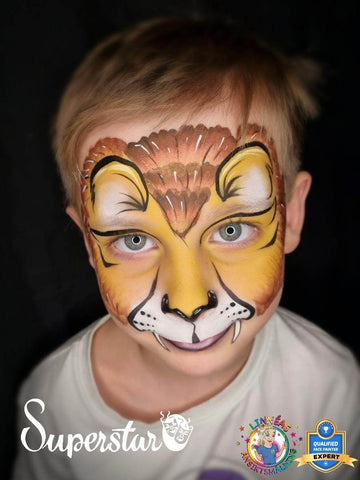
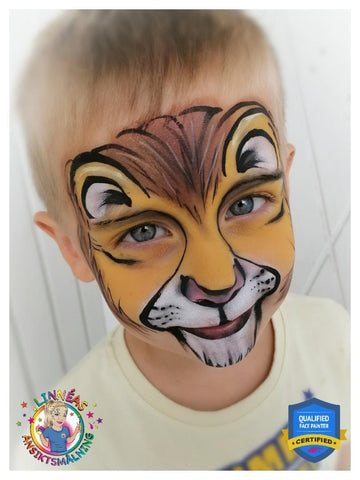
Linnea painted this cute lion using a Little Dream Color Cake by Superstar called Little Safari. The big round ears and mane help create the lion look. If you want to do a cub just paint a little bang versus a full mane.
BLUE GREEN TIGER FACE PAINT VIDEO TUTORIAL
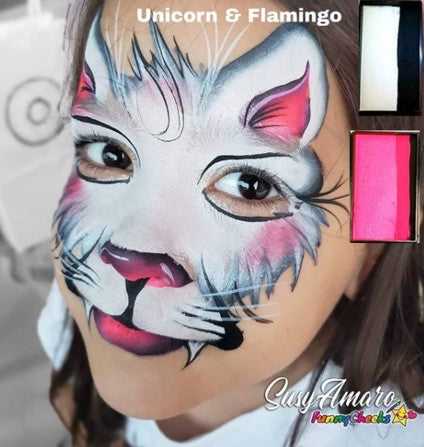
I love this fluffy white cat by Susy Amaro for a lot of reasons! She used her EZ Strokes cakes in Unicorn and Flamingo to do fast edging with a brush around a white sponged base, and the Flamingo for the ears, nose and lips...and a little blush!
This cat face paint design looks complicated, but with some practice you could easily do it on a child. Note the thick line work on the outer size of the muzzle and how it creates dimension and contrast with the lighter fluffy fringe.
The dark line work around the eyes also draws a lot of attention to the child's eyes, and the dark lines in the ears also help create a well balanced design with a little dark line work from top to bottom of the face.
The thin wispy mustache hairs and eye brow hairs add more detail and realism to this cute kitty face! Use a number one round or liner brush to create these thin lines.
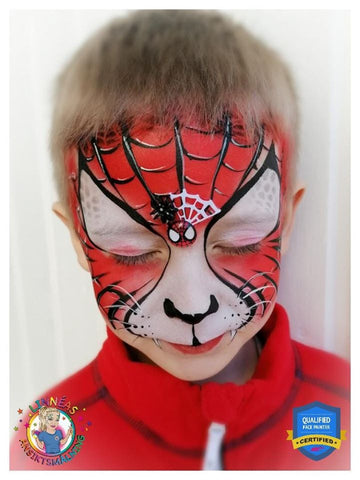
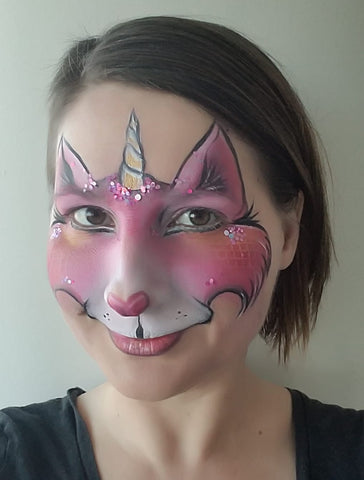
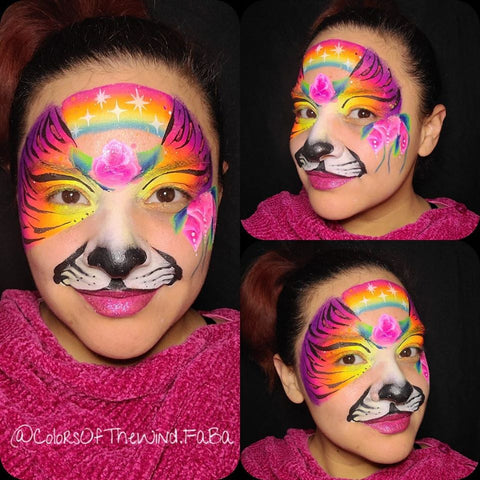
Sophia Vega painted this super creative and colorful Butterfly Cat with Rainbow and Roses.
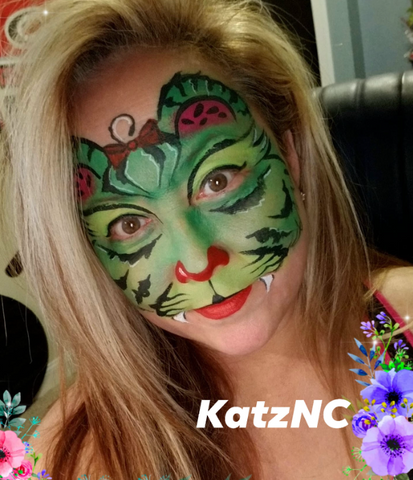
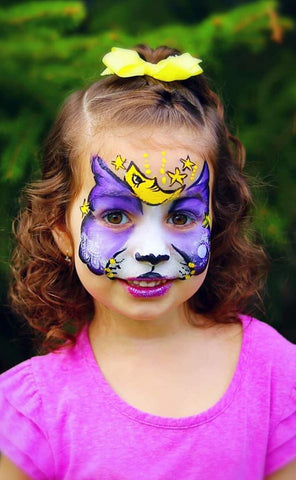
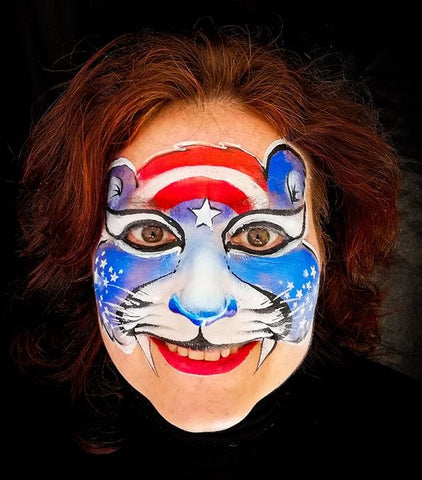
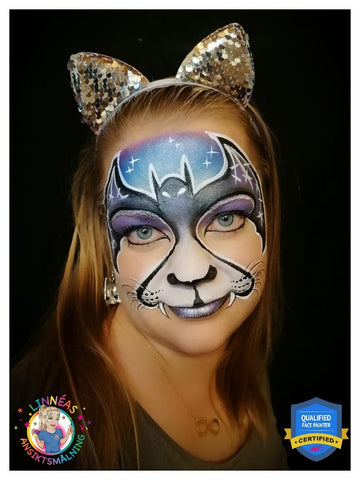
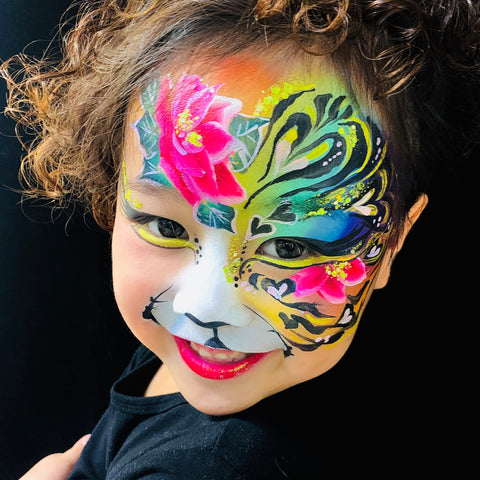
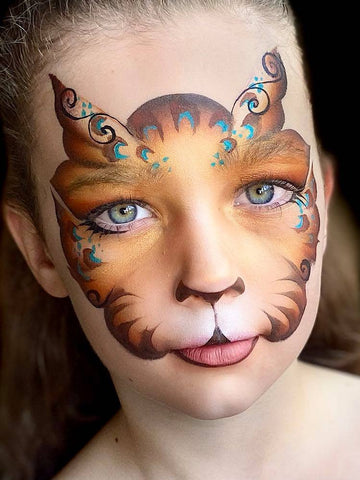
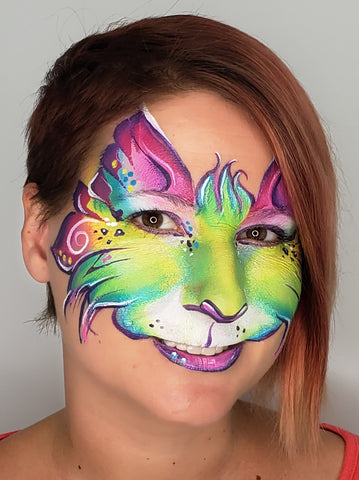
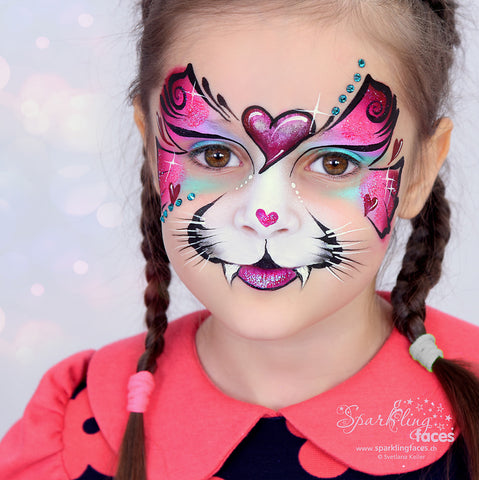
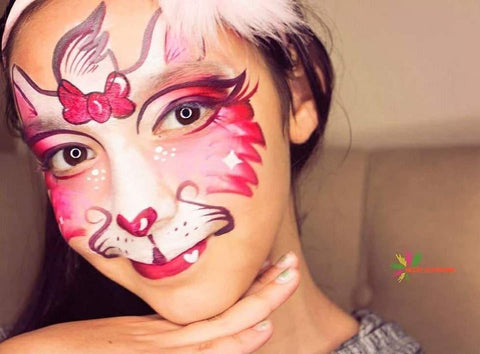
Gaby Renteria created this cute Valentine's Day cat face paint design with a cute bow and heart nose and lip highlight. The edges of this cat face painting design were done with pink and red 1 stroke, but you could just base the face in white and pink and then edge it with red on a flat brush creating zig zag fringe.
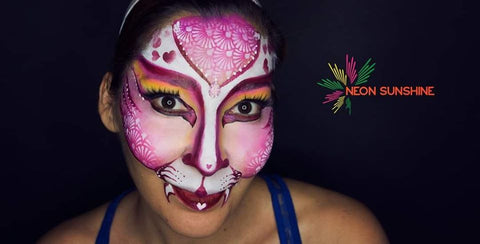
Gaby Renteria used cute stencils to filling the the colored spots of her pink cat face paint design, and added hearts above the eyes and a little one on the nose and lip to make this a Valentines day face painting design. This cat makeup is perfect for kids and adults.
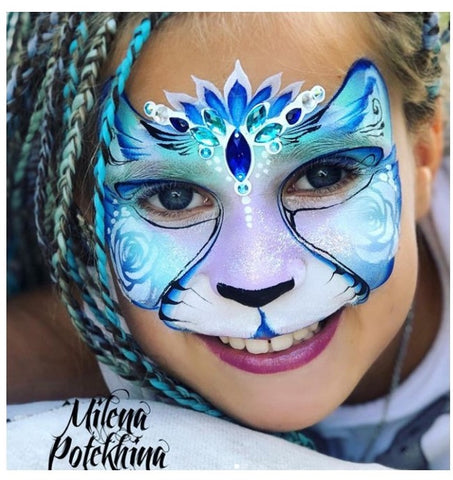
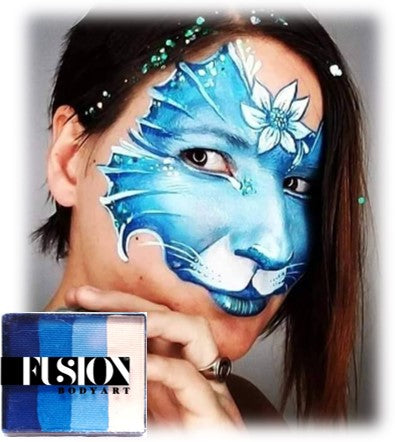
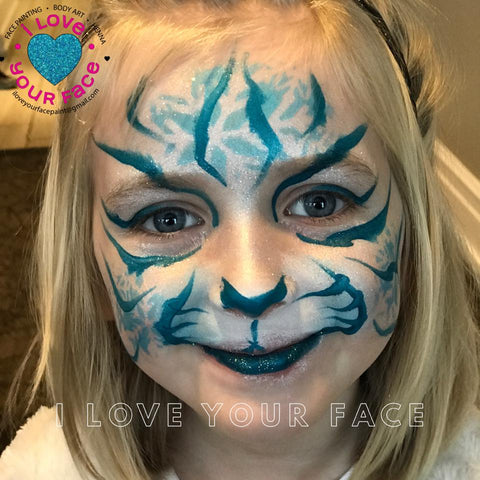
Looking for face painting ideas for the holidays? Paint your cat face in blues and white or add some snowflakes, holly or a Santa Hat to add a Christmas or winter twist!
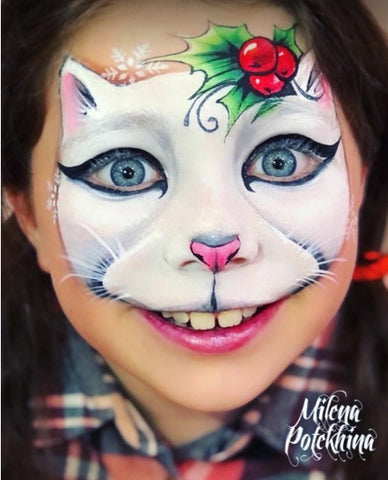
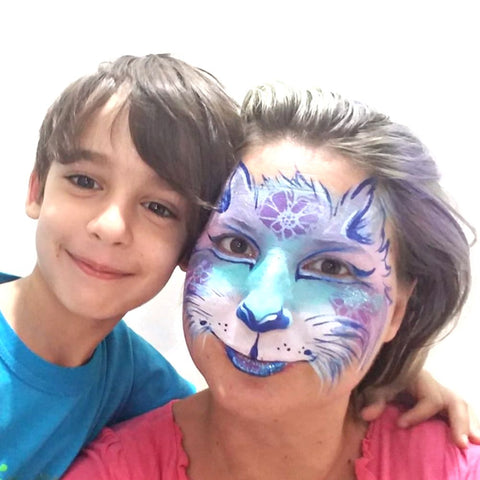
The cat above uses soft Fusion colors and a TAP Stencil for texture. The cool colors give it a snowy feel.
10+ In Stock!
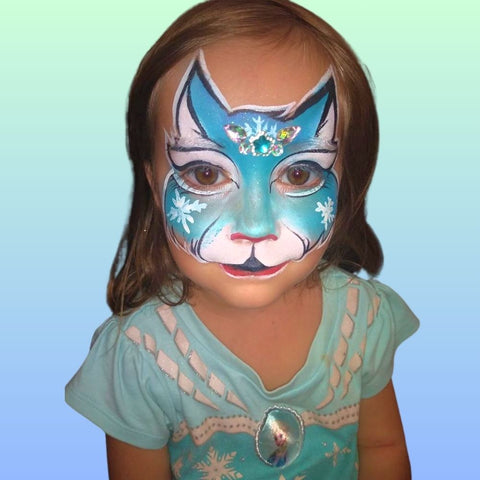
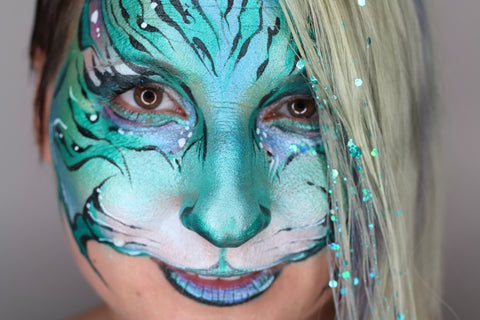
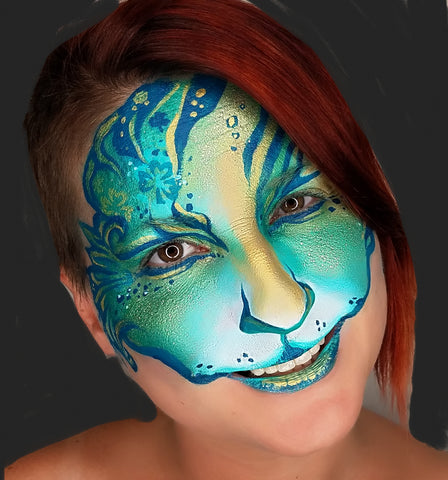
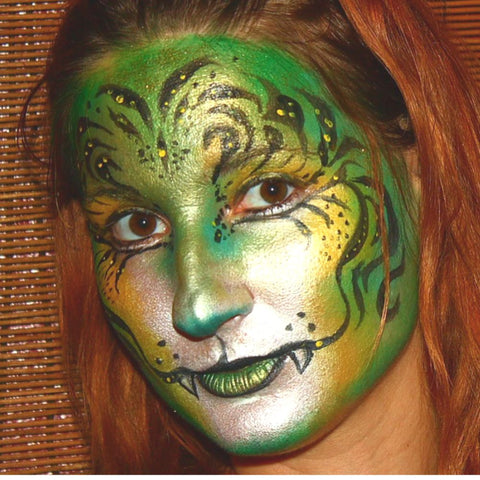
What happens when you try to use almost every color in the rainbow? Do you want a bright colorful cat to grab attention and spread happiness?! Below are a lot of colorful kittens with fantastic face paint colors. I hope that you like these face painting ideas for your next gig!
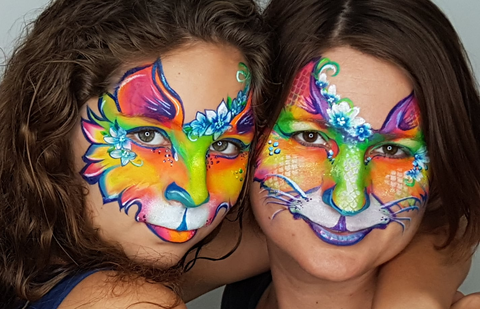
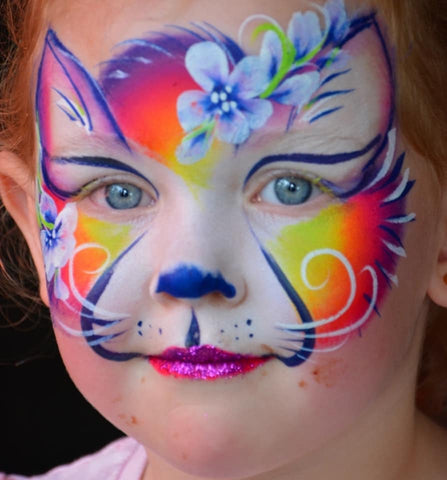
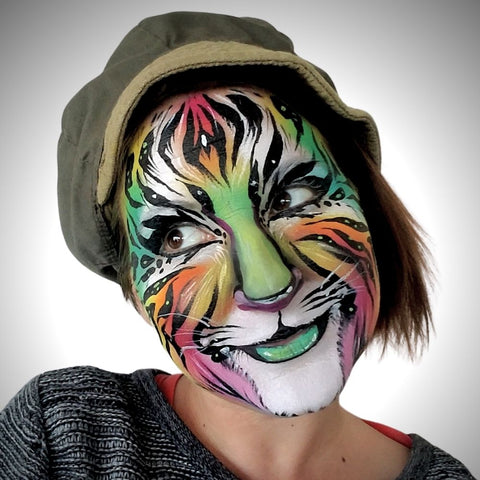
This tropical color was really fun to paint. I sponged on each color one my one and flowed them into the center of the face. When sponging on colors make sure to not blend any together that will make a new color that you are not hoping for. Greens and oranges can make brown etc. I went heavy on the eye liner for this wild cat face paint look...and I really didn't want to wash it off at the end of the night. Oh, note on my forehead how I added fine lines on the stripes to give a more furry effect!
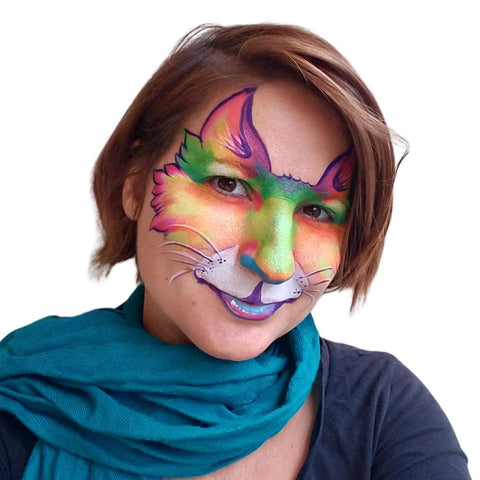
I edged the face with rainbow cakes and added very thin dark purple line work around those strokes to stylize the strokes. This more sheer look is a little more subtle and might be a good choice for someone that doesn't want a lot of make up on for their cat look.
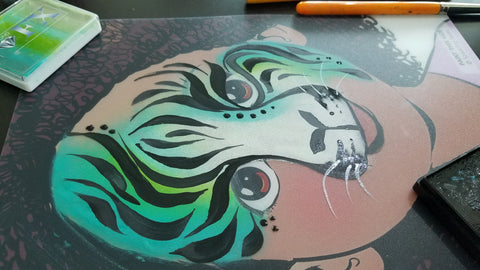
I love love love green, yellow and blue cats! I don't know why I have such an affinity to them, but I do! I was practicing an asymmetrical tiger above with the Diamond FX Large Dragon Fly Rainbow Cake
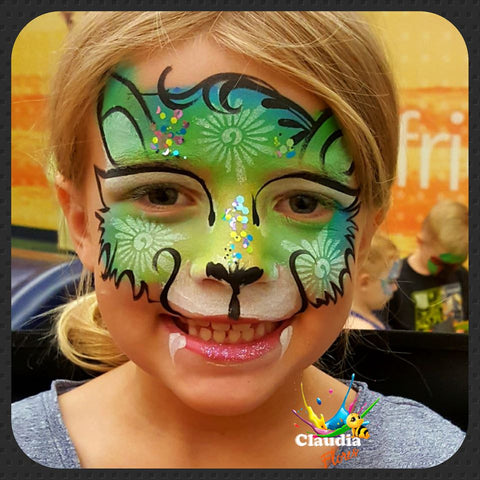
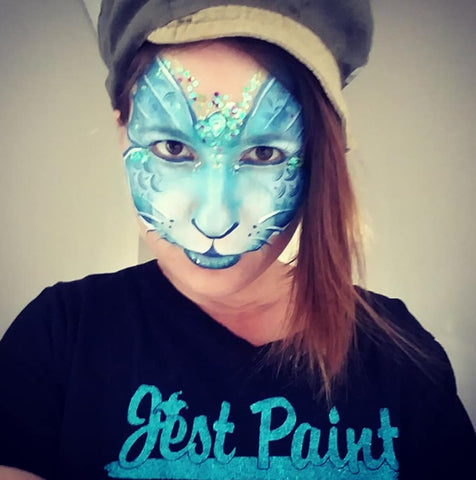
Claudia Flores painted this super cute blue and green cat and accented it with her wild line work, tear drops and a curly bang! She also added a stencil pattern and glitter to take it to another level. If you like the stencil work, she used TAP Stencil Ornate Sun.
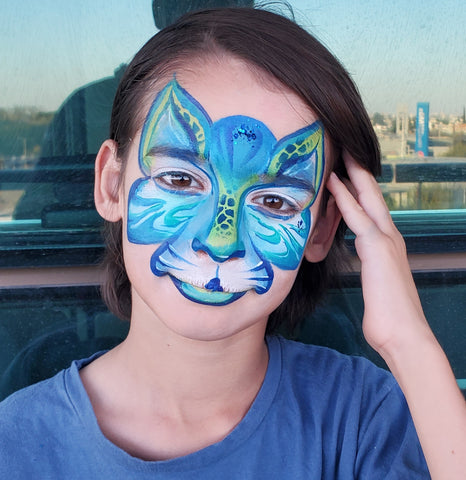
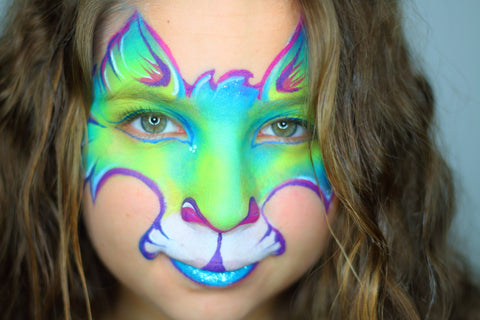
My mother always told me that sometimes simple is better. I tried to come up with a cat face painting design that was very crisp and clean and came up with this bold cat face.
I first sponged on lime green, then teal and then white. I outlined the face in a brush loaded with purple and magenta and really accented the high cheeks with a loop on each side of the muzzle.
I painted the nose magenta, the lip light blue with glitter and did a blue outline around the eyes for a subtle yet kind of aquatic look. Adding tiny white highlights on the nose and the inner edges of the line work made everything POP!
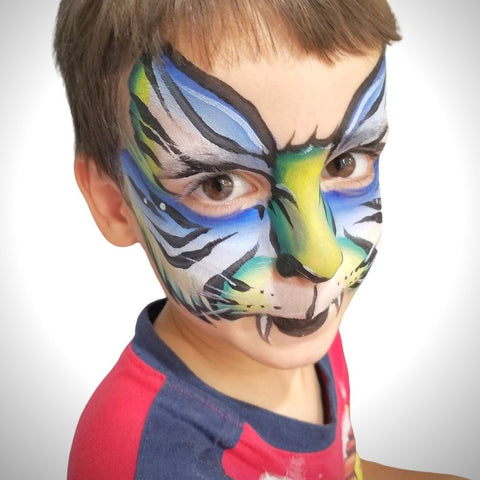
This Green and Blue cat was done with Fusion split cake 1 strokes. I then went over them with black line work and white dots and whiskers.
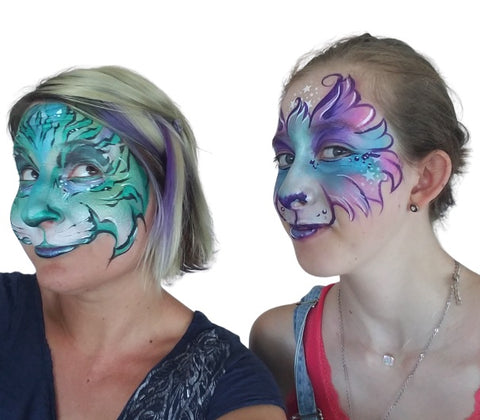
Here are two playful cats with whimsical features! Both are painted with pearl paints and have a lot of flow.
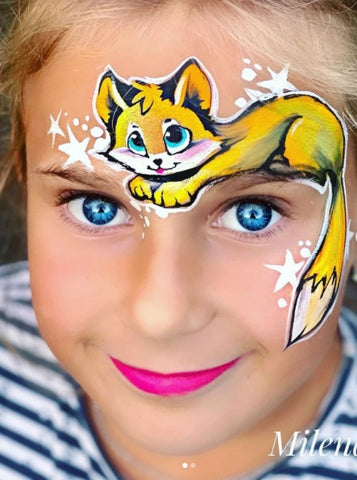
Milena created super cute cat stencils for face painters! She has a few different heads, and you get to paint the body how ever you want. This yellow kitty cat stencil is so adorable, I just can't take it!
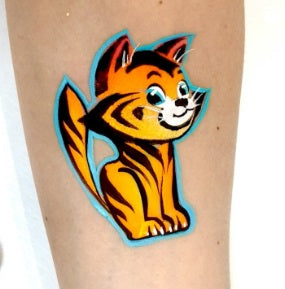
This is her little tiger cub stencil! Milena outlined it in teal to really make it pop!
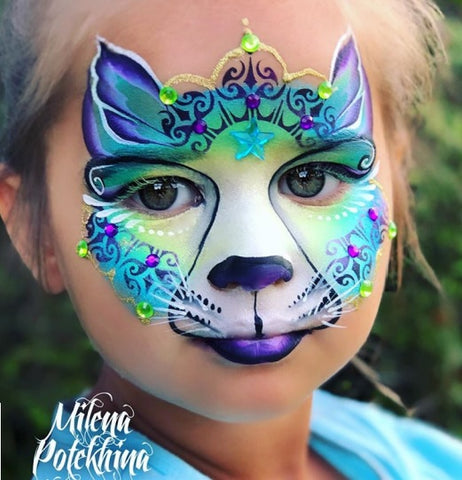
This enchanting cat by Milena Potekhina has such a pretty cool toned base with gems and stenciling using her Milena crown stencil 051. She edged the ears with a black and purple split cakes like this TAG Black Iris 1 Stroke.
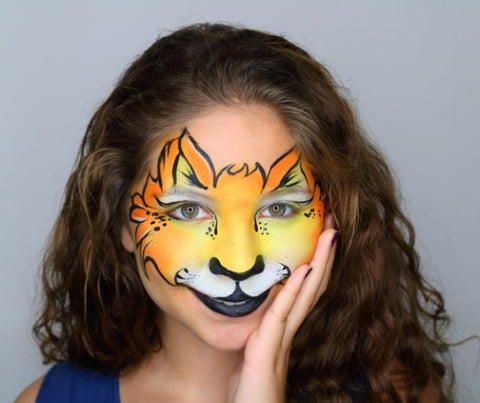
Sometimes keeping the design really simple and putting all the focus on the child's eyes and smile will be enough to create a really pretty cat face. This design has a very smooth well blended base with light colors around the eyes and crisp clean outer line work. The black lips are painted with just a curved triangle on the top lip and a large lower lip to accent the smile going up. When you paint the whole top lip a dark color you care accenting a downward turn of the mouth, so I usually put very little paint on the top lip. I used Fusion Orange Zest and FUSION Body Art Bright Yellow for the base.
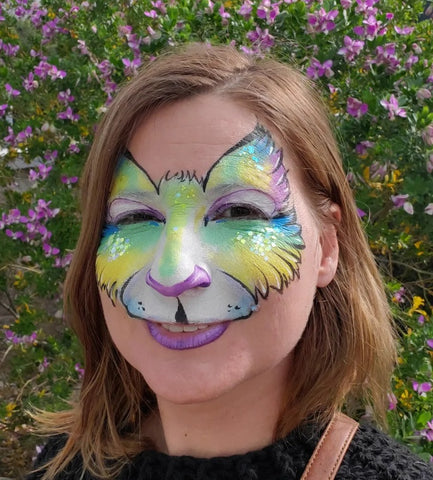
This cat face paint design also follows the ideas above with smooth blending and fine clear line work. I added glitter to the face to add a little detail and sparkle. I love the FUSION GLITTER PALETTE for this. All of the colors are matte Fusion Colors.
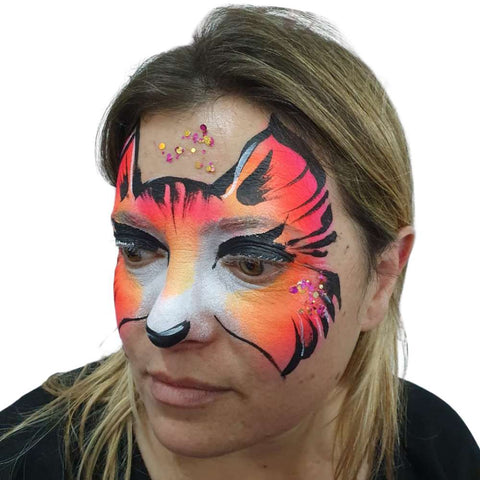
Painting a black cat can seem like a big challenge for a face painter when they get the request for the first time. I recommend starting with white around the eyes and mouth and the bridge of the nose and then blend black in from the out side of the face into the middle. This way the face won't look flat, the lighter color in the middle will give the design some dimension. You can also paint your black cat with silver muzzle and eyes if you don't want to use white. This will give it a fancy look. Black Panther can have silver or blue highlights to add dimension.
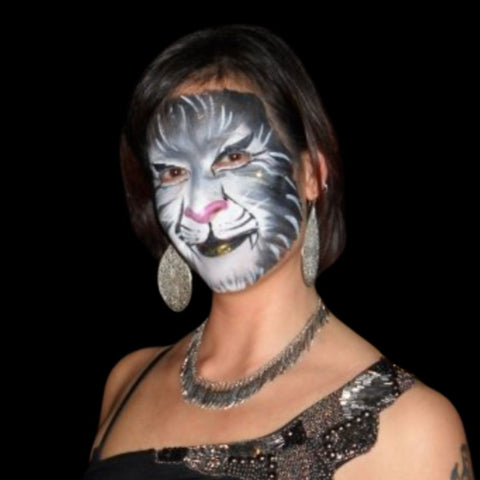
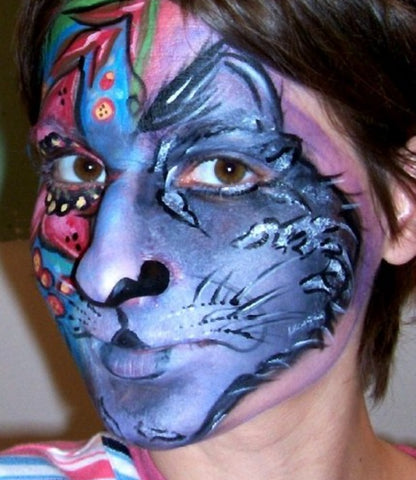
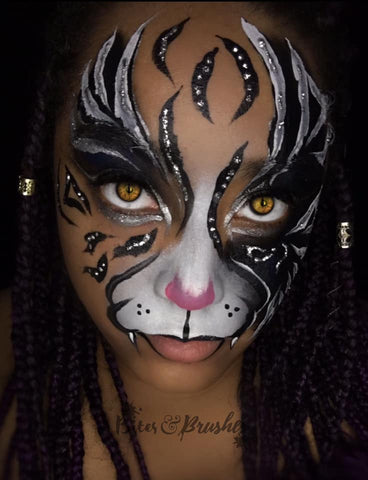
Constance Johnson-Holmes Amazing Tabby Cat / Tiger
There are many ways that you can paint a cat nose. Generally cats have very small noses that connect to a crease that goes down to the upper lip. The most basic technique is to paint a little triangle with the point pointing down, or a little heart. I like to paint the bottom part of the nose and make sure that the paint stays low on the bulb area of the nose. The bigger the nose the more it might look like a wolfe or puppy.

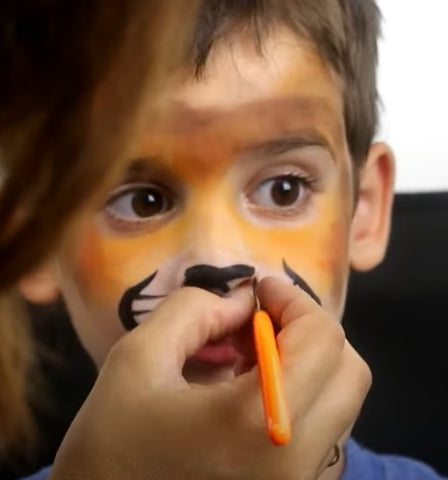
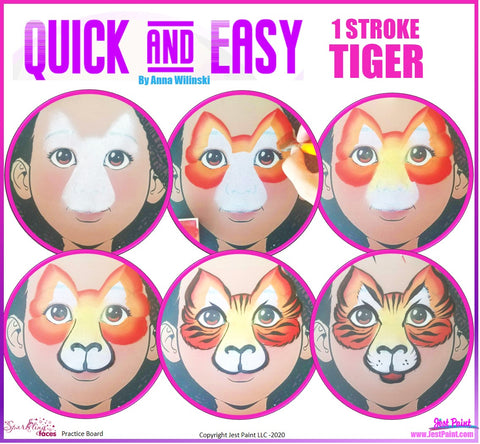
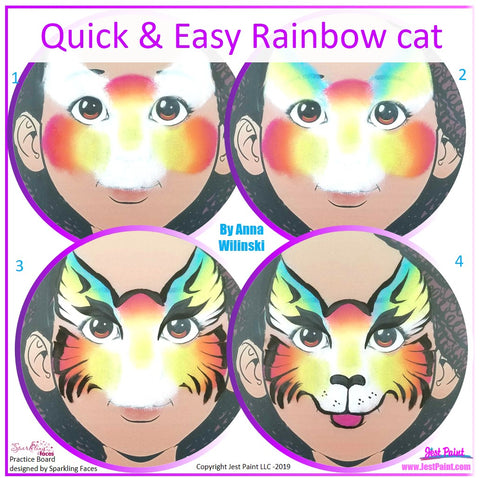
Here is a very basic step by step for a beginner cat using a one stroke cake. This makes the processes faster and creates smooth blending of the colors.
Step 1 - Load your sponge with white face paint and dab over the muzzle, nose and tops of the eye area, like two triangles above each eye. Angle them out a little to the sides of the face.
Step 2 - Load a large flat brush with a few colors from your 1 stroke cake and outline the white triangles, make an arch on the forehead between the ears, and underline the eyes. Keep the dark color on the outside of the face and the lighter color facing in towards the eyes.
Step 3 - This is an optional step where you lightly sponge yellow on top of the nose area.
Step 4 - Outline the muzzle and paint the bottom tip of the nose. Try to make your muzzle line very thin or paint them thick on the top lip and then thin out as you sweep them up around the white and come to a point on each side of the nose.
Step 5 - Paint some thin to thick stripes on the cheeks and forehead, having them radiate around the face and angle into the nose or eyes. Outline the outside of the mask alternating from thin to thick lines to scruffy hair if you want to. Outline the eyes. A small line above each eye that flicks out towards the side of the face will give the cat eye look.
Step 6 - Finish the ears with a line and shag around the white triangles where the white and orange meet. Try your best to make them symmetrical. To finish things off add a red lip outlined in black and some lines and round dots on the muzzle just as I did in the picture below. If you wanted the face to have more coverage you could flip the brush over the cheeks and add a second layer, this time having the light color face out to create a light fur shag look around the face.
Painting children's faces isn't always easy since many of them tend to wiggle, look down at their lap, talk, move their arms around and squish up their face. Getting your child to relax before painting them is very important. Yelling at them to hold still will only make them more nervous and could lead to them crying or backing out. We want this to be the best experience possible for a child, so often offering a small reward, like a yummy snack helps, and showing them the mirror periodically to keep them patient during the process also helps. You don't want them to hold the mirror or it will get in the way while you paint.
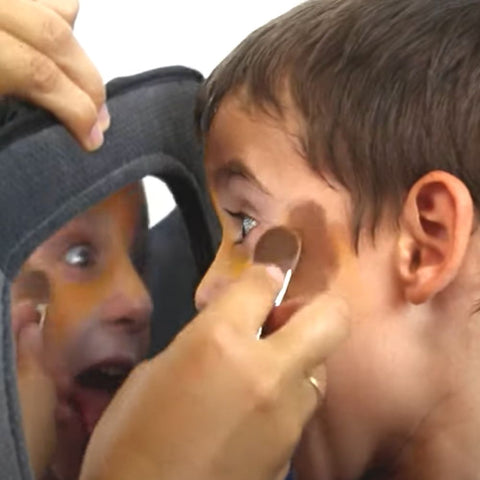
Make sure that you are at a height where you can see there face easily. Do not push their head back with your hand on top of their head so that you can see their face. This hurts the neck a lot, if you don't believe me ask someone to do it to you. If you need their face to tilt up so that you can see it better, gently tilt up their face with your finger under their chin, or find a lower chair for your self or a higher chair for them to sit in.
Playing relaxing music and having a pillow that they can rest their head back on helps me a lot when I need to paint my kids. I play pan flute music that has no lyrics for them to sing along to, because that will make it hard to paint a singing kid.
Another tip is to have everything ready before you start painting them, and have a wet soapy paper towel or rag available to wipe off any mistakes. Make sure to wipe off the soap from their skin with a wet towel and pat it dry before continuing to paint.
Analyze the Child's face and map out the design very lightly in thin white face paint. This will help with symmetry if you take a moment to put the muzzle lines, ears and sides of the face. If stand back and look and see that some things are lopsided you can fix it with the white and then going in for the bold colors.
Make sure that you have enough water and paint mixed together so that the paint easily comes off the sponge onto the child's face. You don't want to bother the child by having to press hard to get the paint out of the sponge. If it starts to run out of paint just reapply more paint, you can add more water by dipping the tip of the sponge or brush quickly into the water cup and then adding more paint.
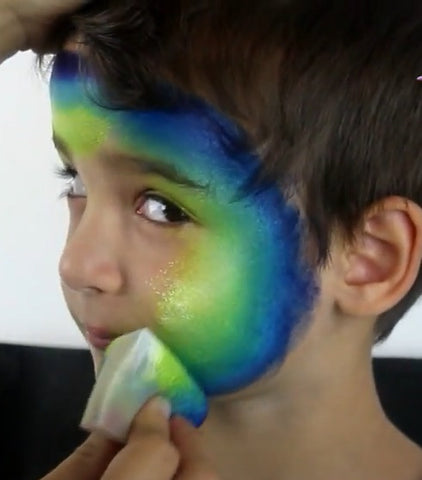
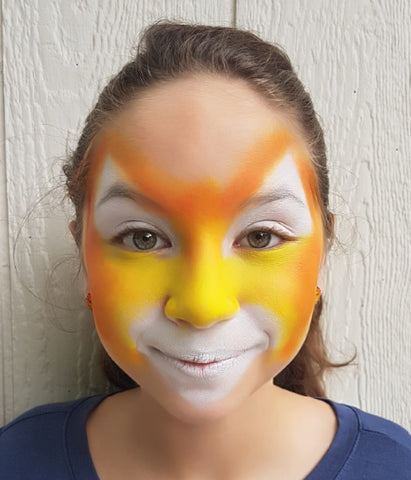
Some kids do not like a large wet brush or sponge filled with paint on their face. Kids with sensory issues may not like face painting for this reason, so it is good to have a back up plan with a set of powders for your base. I use Starblends and Mehron Intense Powders and Ben Nye Lumiere and Rainbow Palette for powder based face painting. You can apply them with smoothie blenders, which are like huge eye shadow applicators.
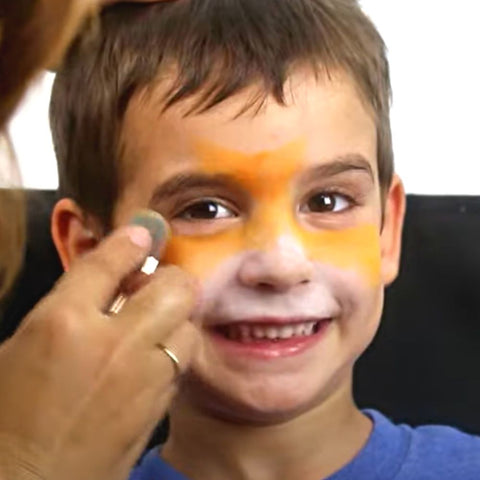
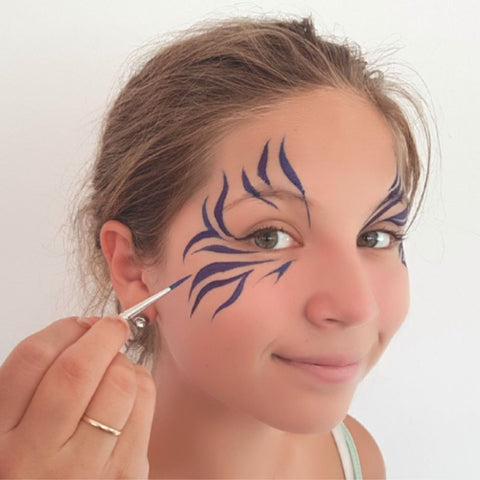
Use a small round brush ( #3 or #4) to paint the muzzle, nose, and stripes. See more information below about how to paint tiger stripes.
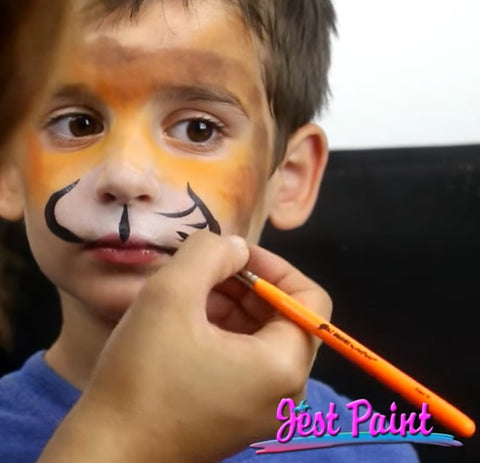
You can add ears to the cat face on the forehead, and paint shaggy fur to edge the design by making long and short v strokes around the edges of the base paint. Have the v's flow in the same angle for a nice look. They will usually point downward on the cheeks with a little curve to them.
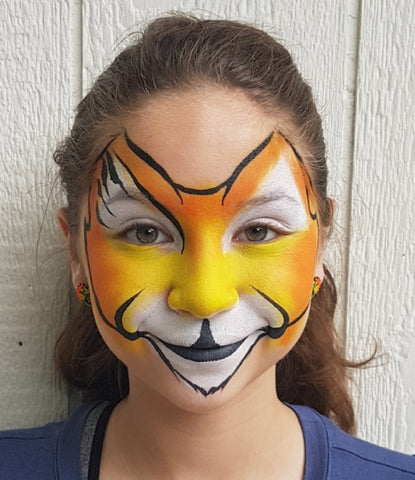
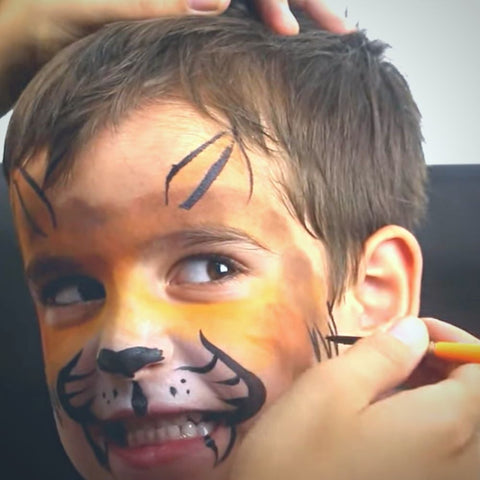
Look at images of tigers and tabby cats for ideas on how these stripes flow around the faces of these real felines. Use those just for inspiration because the human face is shaped a little differently and you might need to simplify and adapt, or even stylize the stripes to give them a different feel.
10+ In Stock!
Hello Kitty has been a face painting staple design for decades. Below you will see a super speedy 1 minute version of the design. Filling the whole upper face in with white will take it up a notch.
If you need to paint a cat face for Halloween or any other event, choosing safe face paint is the most important step you can make. I am linking a video that we made all about face paint safety for you to watch. At Jest Paint we sell only high quality face paints that have been tested and used for years and years in our industry for use on the skin.
We sell pearl, matte, and neon colors in a variety of brands and bases. You will notice a neon warning on any product that we sell, since the neon pigments have not been tested by the US FDA for use in cosmetics, but they have been tested by independent labs according to the manufacturers. We hope that the FDA will make it a priority to test them soon. You can learn more about neon face paint by visiting this blog post All about Neon /UV "Face" Paint Regulations
Well, painting fast might mean a floppy ear or sidewise smile, so I recommend allotting at least 3 - 5 minutes to paint a fast but nice tiger face on a kid. The demo below shows you how fast you can go if you were pressed for time. Just some cute ears, nose and muzzle is perfect for little ones, or even adults. Use 1 stroke split cakes to add multiple shades at once on the face and save even more time! Painting fast tiger face paint designs is great for a play, at a zoo, or for a quick Halloween look. Make sure that the child is comfortable and that you can see their face easily from all angles to make the job go by faster.
Using bold contrasting colors to create a fast cat face paint that pops! I like to mix warm and cool colors on the face, so the eye areas might be cool while the forehead and cheeks are warm.
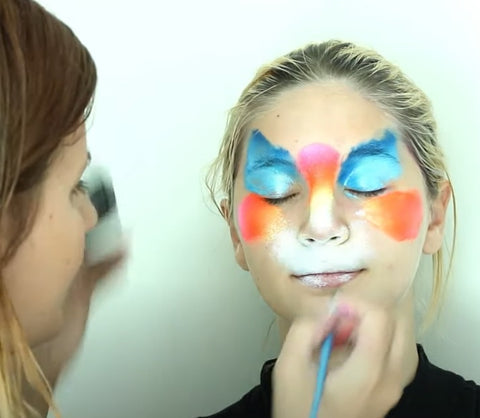
Check out this step by step video tutorial below to see how I painted a cat face in a little over a minute on my daughter. I would have loved to have more time to tie everything in together in the center of the face and add more stripes like the step by step above, but this gives you the gist on how to paint a fast cat face.
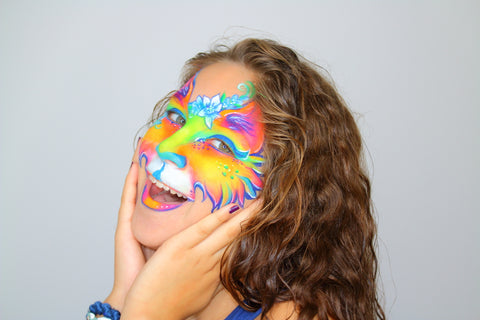
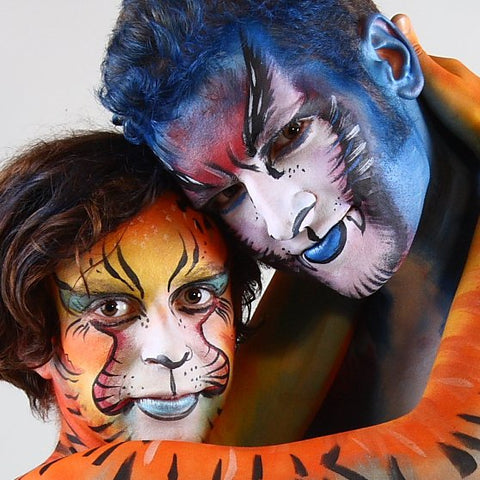
These two felines are giving a bit of Thunder Cat vibes! I had a lot of fun painting them for a special shoot.
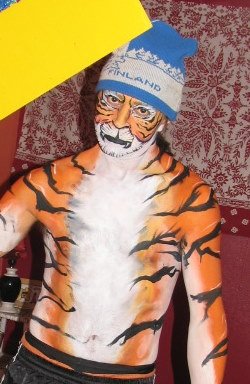
This wild tiger took the streets to protest something...I just can't remember what.
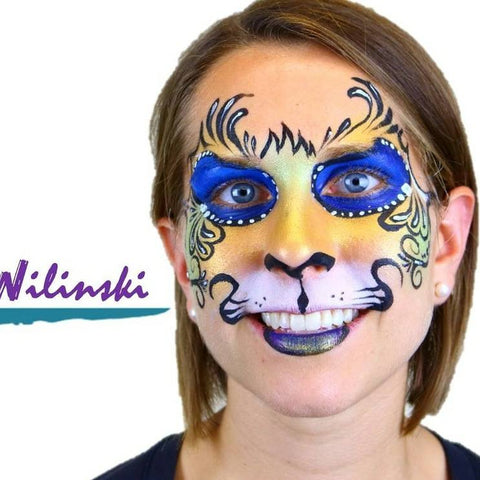
By adding deepened skull eyes and face shape, I gave this cat design some sugar skull vibes.
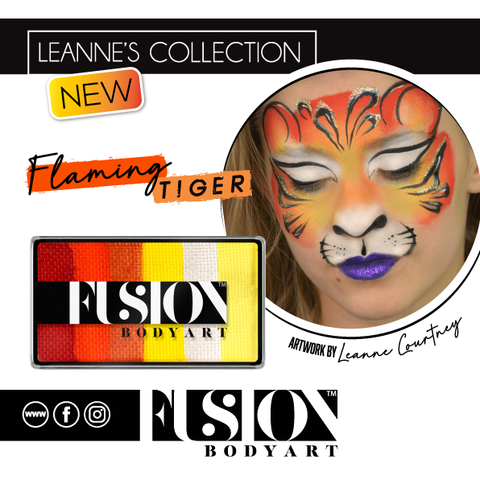
Leanne used her Flaming Tiger Fusion cake for this soft pretty tiger design.
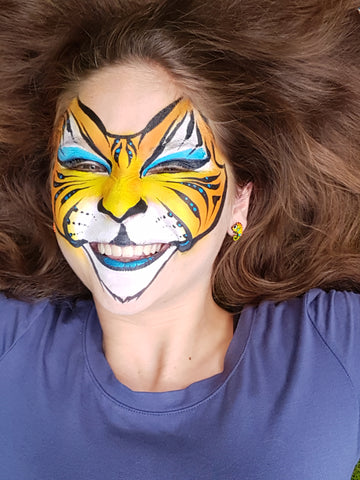
Add some blue eyeshadow and dots to your regular tiger design to make it a little more wild!
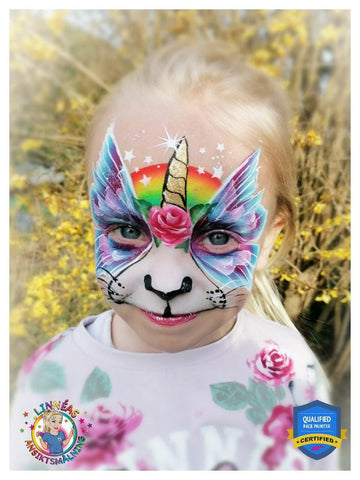
This is a fancy Butterfly Cattercorn by Linnea Novak. Look how creative you can get with your Face Painting! She even put in a rainbow and rose!
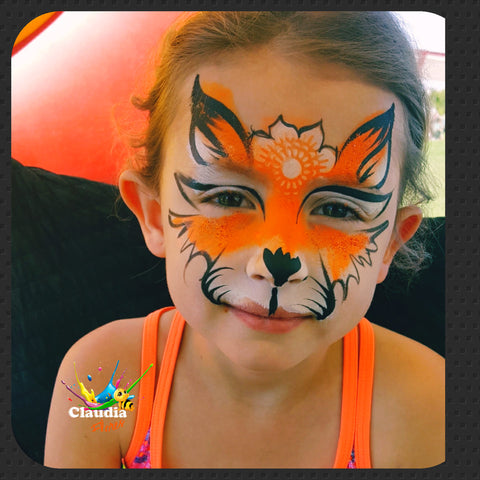
Claudia Flores painted this power punch of an Orange Cat Face Painting design! She added a flower stencil and notice how she made sure it matched the child's clothing?
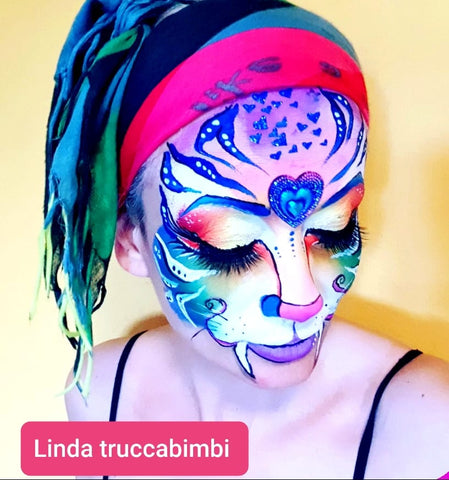
Linda Zafaro Face Painting created this pretty Wild cat in Love!
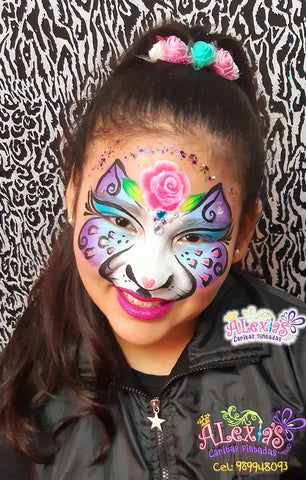 Eva Curia Mendo painted this super pretty cheetah with purple and light blue and added a pink rose between the ears with 1 stroke cake. I like how she added an arch of glitter around her cat face painting and did the swirls in the ears. Super cute!
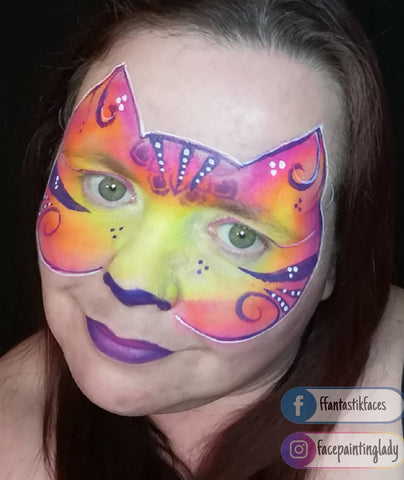
Rachel Green, The Face Painting Lady painted this pretty sunset colored cat design and outlined it in white for extra pop!
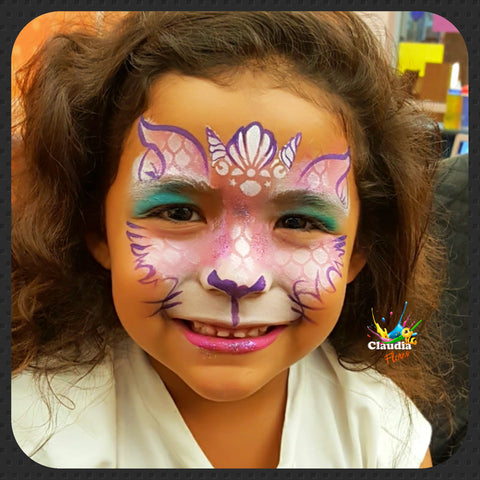
Claudia Flores used scale stencils and a shell stencil centerpiece to create this pretty pink Mercat with sea green eye shadow!
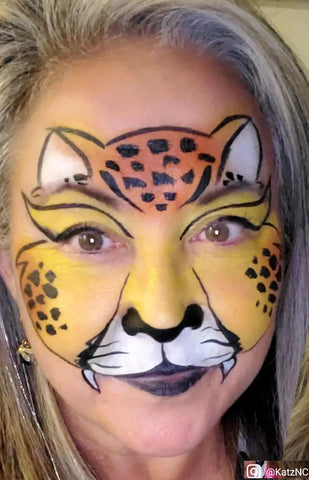
KatzNC face painting of a pretty cheetah. This simple makeup design has a lot of impact!
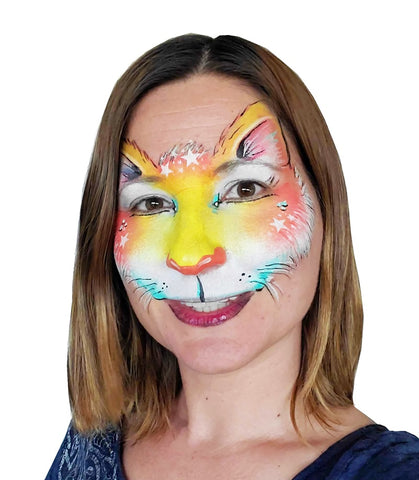
I used Fusion Face Paint in Marigold Yellow, Coral and Paradise Turquoise to paint this soft little kitty. I used the TAP stencil, STARS, to add fun details and I used a rake brush to paint the soft white shag on the edges of my face. Notice how the shading in the ears with tiny hairs and super fine whiskers make a big difference.
If you are interested in face painting for a hobby or a profession, you can learn more basics about face painting by reading this blog post.
How to Face Paint - A Face Painting Guide for Beginners and Parents
You will find tons of tips and tricks about running a face painting business here. How to Start and Run a Face Painting Business - The Complete Guide
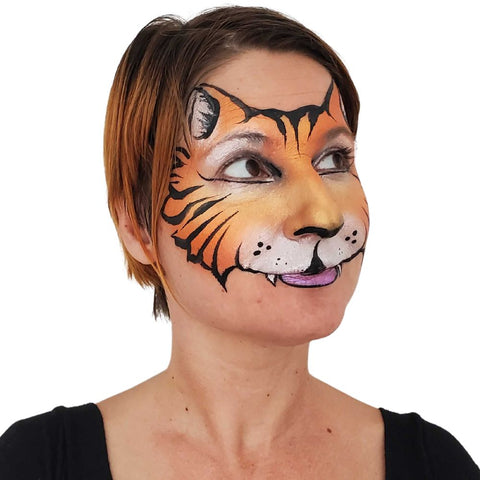
You can take a very similar design and change the whole feel of it by adding fangs, changing the base color or tweaking the strokes to make it look fiercer or friendly.


Cats are still the rage in 2025. Check out A Cat's Life, Flow, Pets, and Garfield is still the rage after his movie. Learn how to capture each cat's expression, markings and colors so that kid can identify them easily. No matter what, Tigers will always be one of the most popular requests you will get if you offer them on your sign boards. Kids love to act out and roar!

 The New Safari Dream Colour Cake by Superstar is perfect for Tigers and Cheetahs! The Tiger above was painted with this pretty and shimmery cake!
We hope that you have been inspired by all of these incredible cat face painting ideas submitted by our Jest Paint Community! If you have any questions or comments please leave them below.
Leave a comment