


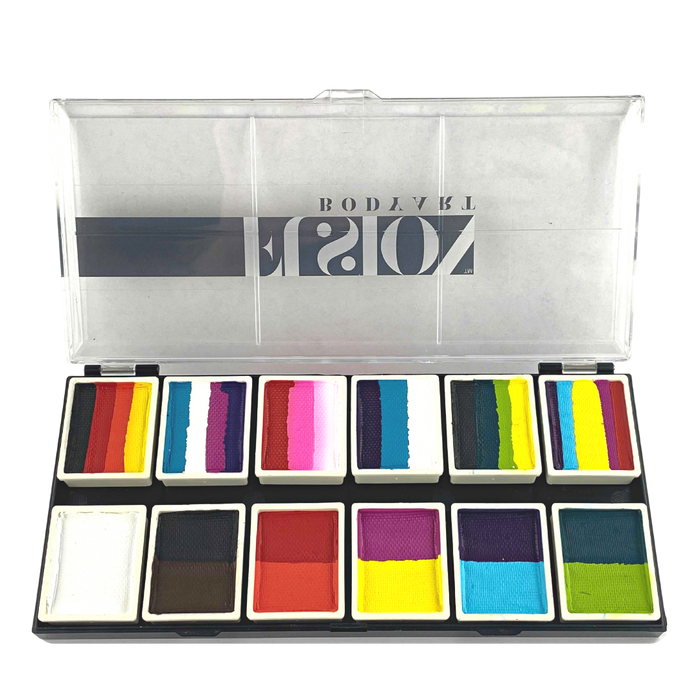


Fusion Body Art | Spectrum Face Painting Palette | Carnival Kit
10+ In Stock!
Starting a face painting business is an exciting thing and we would love to walk you through all of the steps necessary to become a professional face painter and get your business going the right way!

Don't be overwhelmed by the information in here, we have organized it in a way that you can go from task to task, making sure you complete the first task before you move on to the next one. Follow this order and you will be good to go in no time!
Also, if you first just want to learn how to face paint before you look into everything else, then we highly suggest you read our How to Face Paint - A Face Painting Guide for Beginners and Parents blog post. It is a very complete guide to help you learn how to face paint with easy steps and instructions.

The first thing you should do before you consider becoming a face painter is to do your market research. This will allow you to establish if there is a need or could be a need for a face painter in your area, and second, what does the market look like right now. Here are a few things to consider:
First of all, determine what you area of service will be, what cities, and how far you are willing to travel on any given day for a gig.
The best way to know this is to ask yourself some basic questions: are there events in my town were face painting could be used? Can people in my area afford a face painter? Do people in my area know what face painting is?

If you can answer yes to all of those questions then likely there is a need for a face painter in your area. Make sure you do your research to get the right answer, don't just base it of what you think. Ask around, visit public events, see if there are any other face painters out there, talk to event organizers, make observations at birthday parties, etc.
Now that you determined that there is a need for face panting services in your area, you need to study the current market.
Here are a few questions that you can ask yourself: are there any other face painters in my area? Is the market saturated? Can I compete with those who are already established? What kind of services do they offer? Are there mostly new or well established face painters? What is the average price range in the area? Can I be profitable if I charged a similar price? How often can I expect to be booked in any given month? What is the seasonality in our area?
In order to answer those questions you will need to do a little bit of research online, ask other painters in your area, talk with event organizers and agents, check websites like GigSalad and GigMasters. Write down all of your answers, organize them and you will get a good idea of what the market looks like.
Keep in mind that overall the current going rate in the USA for a professional face painter is about $100 an hour for someone that can paint between 10-20 kids an hour (depending on how detailed the designs are). Some painters charge more, a few charge less. There can be extra charges for travel, or discounts for booking more hours, etc. This is just a rough number so you can have an idea of what you can expect to earn. Also, keep in mind that most of the time painters are booked mostly on weekends, so you can expect to have anywhere from 1 to 4 or 5 gigs over a weekend. In general the demand for face painters is higher from March until October, with a low season between November and February. This is not exactly the same for every state.

Based on our own research in the USA, on average, a painter with a well established business that works mostly just on the weekends can earn around $25 to $30 thousand dollars a year. There are some painters that earn a lot more than that because they have an entire team working with them, and others that earn less because they are just starting out or because they do not take as many gigs as they could due to other work or family situations.
Keep in mind that face painting can be a second job or side job, or it can be a full time job depending on your needs and the area you are at. The larger the city the more demand for face painters there is.
If you determine that there is a need for face painters in you area, that you will be able to compete well in your market and that the average earnings are within your expectations, then you can move to step 2.
Keep in mind that starting from now, you might have some expenses. Please make sure to keep track of them using an Excel file and keeping copies of your receipts as some of them, or most, might be deductible from your business' taxes.
So, you have decided that you want to get started, now it is time to get you going. The first step is to get legally established. We suggest you begin by coming up with a name for your business.
In order to come up with your business name you should do some research. See what others around you chose as a name. Come up with a name that is easy for people to remember, that will stand out from other names out there, that is easy to spell correctly when doing a search online and that no one has already registered with your town, your state, or on a website, Facebook Page, Instagram account, etc. Make sure that your business name will look good with all the words smooshed together for a website or email address as well. Sometimes when you push words together they create new words that you might not want showing up.
Once you come up with a business name, is time to get it registered.
Usually you can get a DBA (doing business as) certificate from your local town and you can register your business name with your state if you file to incorporate your business as an LLC. This is an important step as it gives you some rights over your business name. If you know you will do this for a long time and want to have some extra protections of your business name, you can register your business name as a Trade Mark with the USPTO. You can do a trademark search before deciding on your business name to make sure no one else can claim rights on it.
If you use a business name that someone else has a trade mark on, you could have issues when registering for a domain name or Facebook page.

If you need help filing a TradeMark application, LegalZoom can help you out. They can also help you out when forming an LLC.
Once you have decided on your name and registered it with the authorities, it is time to establish your legal structure. It is best to consult with a lawyer first, but usually people go for the LLC structure as that is one that will not complicate your tax filings yet it can provide a level of protection to your personal assets. Check with an accountant and a lawyer on the best way of doing this and the legal requirements going forward to keep the protections that LLCs have.
You can read more about the Legal Status of your Business on our blog post: How to Run a Face Painting Business - Legal/Tax Status of your Business.
Now that you are established, you can check with your city and state to see if they have any special licenses to run your business. As far as we know, in the USA, face painters do not need any special licenses (like makeup artists, or hair dressers).
You will be running a business so you will need at least the following documents (these might vary from state to state):
- Business Tax License (some states require you to have it)
- Contract to be sent to your customers. You can download our FREE contract sample here.
- Articles of Incorporation (if established as an LLC)
- Trade-Mark Confirmation (if you filed for one)
- Trade License (if required by your local authorities)
In order to start practicing and learning new skills you need to have the right products with you. You can expand your kit once you have gained the necessary skills, but before you get to that we suggest you get a basic training kit. You can get all of the mentioned face painting supplies at our store, JestPaint.com.
A Face Painting Palette with some basic colors and split cakes:
10+ In Stock!
Fusion Body Art | Spectrum Face Painting Palette | Carnival Kit
A basic set of face painting brushes:
A set of face painting sponges:
A water cup:
A brush carrying case to protect your brushes:
A sponge carrying bag:
Opalescent White Glitter (to spray over your designs):


Jest Glitz Face Paint Glitter - Fairy Sparks in Fine Mist PUMP - 7gr approx
A set of practice boards to practice your designs:
A few basic stencils:
10+ In Stock!


TAP 007 Face Painting Stencil - Hearts
10+ In Stock!


TAP 012 Face Painting Stencil - Stars
10+ In Stock!


TAP 006 Face Painting Stencil - Animal Print
Now that you have a basic kit, you can start learning how to face paint and practice.
Now that you have decided that you want to be a face painter, that there is a need for one in your area and now that you have a legal name and a business structure, is time to start your education!
Not only do you need to learn how to face paint specific designs, but you need to know how to activate the paint, how to use brushes, sponges, stencils and split cakes. You need to learn sanitation and hygiene tips, the difference between face paint brands and types, how to care for your brushes, etc.

The first step before you learn how to actually face paint is learning about the paint itself. Then you have to learn about activation, different tools, techniques and more.
We have written a long post about all of the different kinds of face paints out there, what they are best for and how to use them. Please follow this link for an in depth review: The Ultimate Face Paint Guide - Brands Comparison.
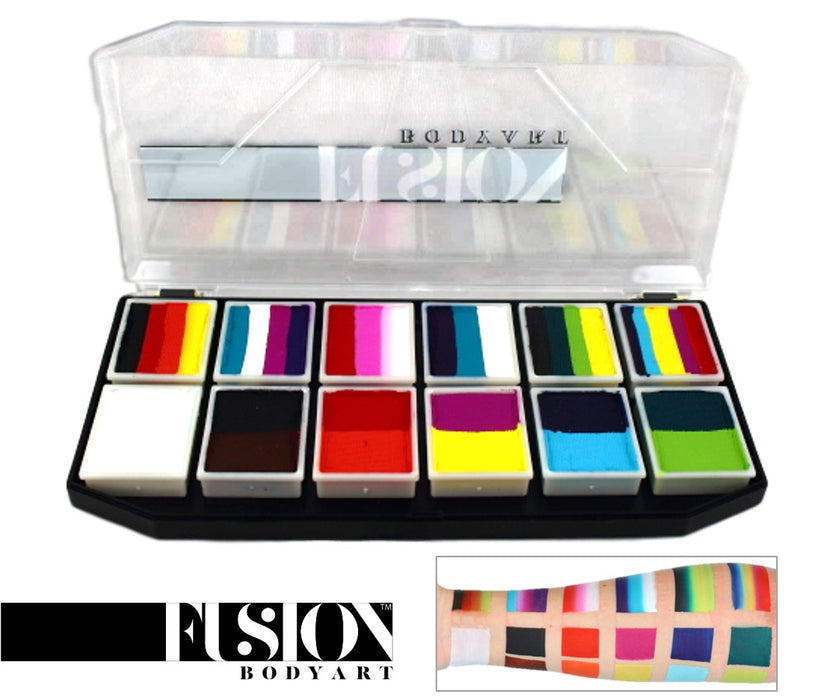
The most important thing you should know is that you should use water activated face paints. Face painters prefer this style since you don't have to set them with powder because they dry to the touch, you can paint fine details with them and they wash off with soap and water, which parents love. You can seal water activate paints with a makeup spray if you need them to be extra durable. We suggest you start with a brand like Fusion Body Art since it is easy to use, provides great quality and it is very affordable:
10+ In Stock!


Fusion Body Art | Sampler Face Painting Palette
The three most common kinds of face paints are: Acacia Senegal Gum based, Paraffin Wax based and Glycerin based. All three styles are very good and versatile kinds of face paints can be used for both line work and base work. Having said that, painters usually prefer Glycerin based paints for bases and the other two for line work. Make sure to check the blog linked above for a much more in depth explanation.
Water activated face paints come in solid cakes (like makeup compacts with removable lids) and they require the use of water to activate the pigments.
To start, get a cup of clean water (or a water container like our airtight stainless steel brush washer or Rinse Well ) and dip your brush or sponge in it. When dipping a sponge, only dip the tip of it and squeeze out any excess water. When dipping your brush, make sure to remove any excess water from your brush using the edge of your water container, before heading to your cake of paint.
Once your tool of choice has been moistened you can go ahead and activate the makeup by slowly rubbing the surface of the cake with your brush or sponge. You can do back and forth movements or circular movements. It is important to take care of your tools and never press to hard. Your face painting brushes are delicate tools, you should never press it down making the bristles spread open or bend at the ferrule, just gently rub back and forward over your face paint cake, maintaining the shape of your brush, until you obtain a creamy consistency on your brush.
If you feel that the cake is too dry and you are not able to get a creamy consistency on your tool of choice then you need to add a little bit more water to your brush or sponge. If on the contrary you feel that you have added too much water and the paint is running, then rub the paint a little longer so that it absorbs the excess water, or tap out some of the water on your brush into your face paint water cup, or on a cloth.
It is always best to start with a rather dry sponge or brush and add more water as needed, than to use too much water at the beginning and then have to deal with drippy paint.
Choosing the right tools for the job is a very important step. Not all tools are created equal, but there are many good quality brushes and sponges that can do the job. We have designed a full range of brushes and sponges specifically created to face and body paint.
Your face painting sponges should be soft and gentle, made from hypoallergenic materials and have small pores. Do not try to use latex sponges or makeup wedges as those are not meant to be used with these paints and will not give you a good finish.
The most basic sponge shape that you want to have in your kit is the half circle, as that is a very versatile sponge that can be used for blending, sponging a background, stenciling and more!
When choosing brushes make sure that you buy brushes with synthetic bristles as natural hair brushes are too soft for this kind of makeup. Also, make sure you don't go for the super cheap craft brushes as those have very hard bristles and are almost impossible to use with face paints. Heavy handed painters may need a firmer brush, while those with a delicate touch might prefer softer bristles.
You can check our line of Bolt Brushes that we specifically designed for face painters.
Once you have chosen a good set of brushes to work with you have to make sure you take good of them!
Check our How to Take Care of your Face Painting Brushes | Brush Repair Tips for a full review on how to take care of your brushes.
Also, check on our How to Sanitize and Clean your Face Painting Brushes and Sponges to learn more about cleaning your brushes and sponges.

When you use a face painting brush for the first time you will notice that the bristles have been protected with a gel coat to keep them in shape while stored. This coat can be easily removed by getting your brush wet and swirling it around a few times without pressing too hard on the brush.
It is always best to only dip the bristles section of your face painting brush in the water, instead of allowing water to go above the ferrule. If water goes above the ferrule, it can get inside of it causing the wooden handle to expand which in turn can crack the protective paint coat on the brush handle. Water can also weaken the adhesive that keeps the bristles in place, and the ferrule in place, which can cause bristles to start falling off and the ferrule to be detached from the handle.

To activate the face paint simply dip your face painting brush tip in water, wipe the excess water on the edge of your water cup and swirl your brush on the paint. If you are using a round face painting brush, then do circular moves over the surface of the face paint until you obtain a creamy consistency. If too much paint accumulated on your brush you can wipe the excess face paint on the edge of your face paint container. If you are using a flat face painting brush then do back and forward movements on the surface of your face paint cake until you obtain the same creamy consistency.
You can read more about this topic on our How to Face Paint - Step 4: How to use Face Painting Brushes blog post.

The most basic face painting sponge is a half circle since that shape is really versatile. You will use the flat side of your sponge to activate the paint, and you can draw on the face with it to make the shape needed. The sharp end will help you make straight and curved lines. The rounded edges are great for blending in different colors and smoothing out your base coat.

There are many other face painting sponges shapes and each have a particular purpose, we will touch on that later on when we look at more advanced tools.
To use your sponge simply grab one end of the half circle and dip the other end in the water. It is important to keep in mind that face painting sponges are porous and they can absorb a lot of water, so it is always best to only dip the very edge of your sponge and squeeze out any excess water. Now gently but firmly rub the moistened tip of your sponge against the surface of your face paint, back and forth until you obtain a creamy consistency. If your sponge is too wet the face paint will run on the skin and your design will look messy and transparent. If you got your sponge too wet, squeeze the excess water inside your water cup and work the paint on the cake until it gets creamy again (more paint will need to be activated in order to absorb the excess water sitting on your cake).
It takes practice to get the water/paint ratio right so don’t get frustrated and keep trying. Once you get it, it will come out naturally and you won’t need to think about it anymore.
You can read more about this topic on our How to Face Paint - Step 3: How to use a Face Painting Sponge? blog post.
There are a few basic techniques that you need to know when face painting, we have written separate blog posts for each of them, so we will reference those posts below. You can open each one of them to learn all there is about it.
Base Work: learn how to sponge on a base that is smooth and even. This is the first step to almost every design. Check our How to Face Paint - Step 5: Creating a Smooth Base Coat blog to learn all about it.

Line Work: this the second most important part of any design. Your line work will help you add details and create a shape for your design. Now, line work is not just lines, it includes learning how to do thin to thick lines, teardrops and swirls. You can read our How to Face Paint - Step 6: Introduction to Line Work to get a proper introduction to this topic and then visit our other related blog posts:
How to Face Paint - Step 6: Thin to Thick Face Painting Lines
How to Face Paint - Step 6: How to Paint Tear Drops
How to Face Paint - Step 6: How to Face Paint Swirls
Structure of your Design: once you have mastered your basic tools and techniques it is important to learn how to make a face painting design look good. You can learn all about focal points and why they are important on our How to Face Paint - Step 6: Focal Point for your Line Work blog post.
This particular tool is something you can wait on until you have worked on your basic skills, but, it is a great tool to help you get great looking designs in no time, so you might want to read our Face Painting with Stencils - Instructions and Best Stencils Guide to learn all there is to know about how to use, display, care for and store your face painting stencils.

Using split cakes is one of the best way to achieve great looking designs in just a few strokes. People love to see all of the colors come out of one brush, and you will be able to paint faster and with more dimension! There are basically two sizes of split cakes: large and small. The large ones can be used with sponges to sponge an entire base in just seconds, the smaller ones can be used with 3/4" or 1' wide flat brushes and are great for smaller designs by the eyes and cheek and body art like flowers and snakes.

To load a split cake, hold it in a way that the stripes are running up and down (not side to side) and swipe your sponge or brush back and forward making sure to always align your applicator with the split cake so that colors don't get muddy. If there is too much water on your applicator the excess water will run down each color stripe rather than across the stripes, preventing your cake from becoming muddy.
Then, once you have a nice full load, swipe your sponge or brush on the face following the shape you wish to make. You can load a large split cake that has orange, yellow and white with your sponge and load it in a way that the orange is on the outer side of the face and the white on the inner side and then you can paint the details of a tiger face on top. Here is an example on how to do that:
Quick and Easy Step by Step Face Painting | Rainbow Cat
Or, you can load your brush with a rainbow style split cake and swipe it across the forehead to create a rainbow effect. The possibilities are endless.
Once you have mastered all of your tools and techniques it is important to consider sanitation and hygiene. Since you will be interacting with people all of the time, it is important that you do this in the most hygienic way possible to keep you and your customers healthy and to avoid unnecessary risks.

The basics of hygiene is that you should always use clean brushes, clean sponges and have an overall clean set up. You can read how to achieve that on our Top 10 Safety and Hygiene Tips for Face Painting - The Ultimate Guide blog post.
Once you start going out to paint you will notice that some designs are requested much more often than others. From our own experience these are some of the most popular designs you should learn how to face paint first:
- Butterfly - Tiger - Super Hero - Unicorn - Mermaid - Cat - Princess - Skull - Dragon - Monster -

There are, of course, many ways to face paint each one of those designs, so have fun coming up with your own style of each kind. You can go to YouTube, Pinterest, Instagram, our blog and do some Google searches to find some inspiration.

When is time to wash off the paint you should always start with a sponge or cloth and some soap to work the paint off your skin, before applying water. If you apply water first the paint is more likely to stain the skin.
Once you have loosened all of the pigments with soap you can rinse off and repeat if necessary. If any stains are left simply put some lotion or baby oil on your skin, let it set for a few minutes and remove again. Always be gentle with your skin to prevent getting a rash from too much friction.
If by any chances you still have some stains, wait until the next day. More often than not regular sweating and friction with the pillow overnight will help remove the remaining stains .

As you know, the only way to get your business going is doing some good marketing. The first thing to get you going is to build a simple website and get some business cards that have your contact information and website address on them. We will go over a full list of ideas and things you need to get done to get people to find out about your business.
By now you have a business name, but now it is time to get a logo. This can be a very important part of your marketing strategy as a logo creates a visual name for your business that people can remember and relate to you. Your logo should be simple, easy to recognize, different from your competitor's and memorable. Contact a good designer to make a logo for you. You can do some online research for inspiration. Make it look fresh, updated and fun!
![]()
Once you have your logo you are ready for a website. Make sure to register a domain that is easy to remember, easy to spell and that is as close as possible to your business name (an exact match is better, and use the .com option as that is the one people tend to use most often).
Your website should have relevant content that is well written, it has the proper key words and is optimized so Search Engines can easily categorize it and display on it when people do related web searches. You can research how to do Search Engine Optimization (SEO) for your website, there are many well written guides, we love this one: The Beginner's Guide to SEO

The most basic things you should know about your website are:
- The main content should have all of the needed information for someone to decide if they want to hire you or not: service provided, area of service, your business name, your contact information, reviews, rates, examples of your work, information about insurance, products used, etc.
- The contact page should have all of your information including your business name, your name, your e-mail address, your phone number and address (you can use a PO BOX if you don't want your address to be public).
- You should use targeted keywords that are relevant to your website: like face painter in AAA city, face painting services in AAA city, etc.
Read the SEO guide linked above for a full explanation on how to get your website listed higher on Google search results.
The more profiles your business has, the higher chances your business will come up when people do searches online, and the more options to interact with costumers you have.

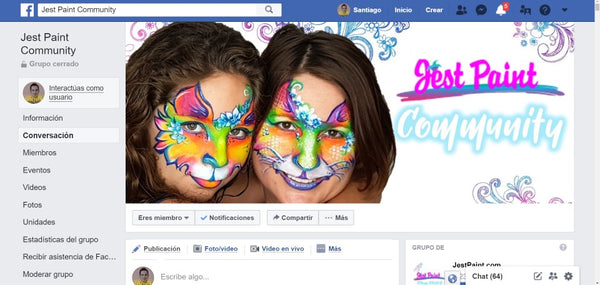
Make sure to set up at least a Facebook Business Page and an Instagram Profile since those are two of the most popular social media sites in the USA.
You can learn how to create a Facebook page by clicking here.
Google Maps results come up very high on local online searches so your business should be listed with Google Maps. You can learn all about setting up your "Google my Business" information here.
Print Business cards with your business logo and contact information. You can add an example of your work as well and you can even add washing off instructions on the back of your card so people are more likely to keep it, and it gives you an additional reason to hand it out to every parent.
You can read our How to Advertise your Face Painting Business to learn about many other ways of advertising your business, including word of mouth, working with agents, advertising on Yelp, CraigsList, GigSalad, GugMaster and more!
Getting your face painting business insured is a crucial part to running a successful and profitable business in a professional and safe way. Insurance will give you and your customers piece of mind and will make you look more professional as well. Please check our How to Run a Face Painting Business - Entertainers Insurance blog post to learn how and why to get insured.
Once you have taken care of the basic things it is time to get organized so that when you start to get bookings you can take good care of them. Also, this is a good moment to get organized with your book keeping so when you need to get your taxes done at the end of the year you don't have to waste hours trying to find all receipts and booking information.
We have written a very detailed blog about all of your potential expenses and income sources and what is the best way to keep track of them. Please visit our How to Run a Face Painting Business - Book Keeping Essentials blog post to learn all about it. Also, don't forget to download our FREE Book Keeping Spread Sheet specially designed for face painters.

Keeping your bookings organized will allow you to stay on top of your game. By staying organized you will always know what days you have available and which ones you don't, you will know all of the information you need from every gig, and you will avoid being late to a gig or double booking yourself. When your customers can tell that you are organized, they will know that hiring you was a good choice and they can trust that you will show up and do a great job.
We have written a short blog post about booking gigs, please read our How to Run a Face Painting Business - How to Record Your Bookings to get more information about this, and don't forget to download our FREE Bookings Sheet for face painters to keep all of the information you need in one place.
Now it is time to think about your rates. Designing your rate's structure can be complicated at first since you have to keep several things in mind, but once you have them you won't have to worry again for a few months until you are ready for a rate increase.
The first thing you should consider is what the average rate for you area is for a similar service is. Based on that, you should analyze the quality of the work your competitors offer and adjust your rate based on the quality you can offer. It is ok to start charging a little less than average if you can't offer the same quality as someone that has been doing this for a long time. But, make sure that once you are at their level your rates reflect that.
Speed is another important factor, you should practice until you can paint 10 to 12 kids in one hour, and if you are painting slower than that maybe your rate per hour should go down a little since you can paint less people.
If your competitors are charging a very high rate, take advantage of that market situation and don't undercut. Just charge based on your speed and experience, but don't go too low. If you go too low a few things will happen: other painters in your area might get mad at you as it can be seen as under valuing the industry as a whole in your area. Also, if you charge too low people might start to wonder why and they might not book you out of fear that you are not very good at what you do. Most importantly, if you charge too little you might end up not making any money after expenses, or not enough money for your time.

Remember that the rate might not be the same for face painting, than belly painting, body painting, henna, glitter tattoos or balloons. Each service requires different skills, different supplies, different set ups and each one should have a rate that adjust to those conditions.
Some people like to charge an hourly rate (most common), others charge per event, some set up a rate per person painted. Some choose the method based on the type of event. It is important that you decide how you will bill people and starting with a per hour fee is usually the easiest option. Keep in mind that some painters offer a discounted rate for events that are on week days (to encourage week day bookings), others offer a discount if someone books the painter for multiple hours; some charge more for corporate events versus family events. These are all factors you need to keep in mind when designing your rate's structure.
This is also an important part of your rate. You should choose what your service area will be, and then how far from home you are willing to travel and how much you will you charge for travel. Usually you set up a distance for which no extra charges will be billed, and then if the event falls outside that area you can add a travel fee that can be in cents per mile driven, or in cents per minute, or just a flat fee. This should help you cover the extra gas, time, and car's wear and tear that you will go through due to the event.
Now, when setting up a rate it is very important to keep in mind how much it cost you to be there. Don't just think of your time, but the supplies used, the insurance, taxes, money spent training to become a face painter, time spent booking the gig, getting there, day care expenses, cleaning your supplies, getting back home, etc. Keep in mind all of those expenses, and you will be more inclined to charge what you really should. If you just focus on your time at the event and nothing else, you might think $100 is too much, but count all of the other items we just mentioned and you will see how you will want to make sure you charge a reasonable fee.
When you book an event you will only bill them for the hours you spend painting at the event, but you have invested a lot more time than just that to be able to paint at their event. Keep in mind the following time spent:
- Booking the event: going back and forward over e-mail and phone to get the details, get your contract signed and the event paid for.
- Preparing your Kit for the event: cleaning your kit, refilling your supplies, placing orders for special things needed for just that event.
- Practicing New Designs: if the event required you to paint specific designs then you need to practice them and create a display.
- Getting to the event, unloading your kit and setting up.
- Painting at the event.
- Tearing down your set up and going back home.
- Cleaning your kit so it is ready for the next event.
It is very common for entertainers in general to get asked to volunteer at several events throughout the year and many will tell you how much exposure you can get at their event. Reality is that at the beginning of your career as a face painter you might need that kind of event to get the word out about your business. So, it might be good to take a few of those gigs, but you should be clear with those asking you that you will be taking this opportunity this year because you are just getting started. This is so that next year they don't assume you will do it for free again.
You might want to choose a few charities or causes that you want to do for free every year and volunteer for those. Many painters suggest you try and get sponsors for those events. Sometimes, a company attending the event might be willing to pay you your hourly rate in exchange for them putting a banner by you and a sign that says "face painting sponsored by ...". This is a great way of making your services free to the public and the charity, while still getting paid.
Always answer in a polite way, and make sure that you can provide the event with a few options. Maybe you can't volunteer on a Saturday because that is when most paid gigs happen, but you can offer them a reduce rate on week day, or they can find a sponsor for you, or they can charge the public to get painted and you can donate a percentage back to the charity. Offering options and remaining polite will make you look professional and at the same time it might actually get you the gig while still getting paid. Remember that most fundraisers have budgets and they pay for a lot of services and items for their events. There is no reason that they can't make you a part of their budget in the future.
Now that you are ready to go out there and face paint as a professional face painter you need to get yourself a professional face painting kit and a proper set up.

These are some basic items you will need beyond what was suggested in point three.
A - Once you have practiced and you are ready to do some long gigs, you should get professional size face paints. They are more economical in the long run than small palettes and they are easier to work out of. Check our Fusion Body Art, Superstar and Global solid color cakes. They are great brands at a very good price. You should at least have the following colors: Black, White, Red, Orange, Yellow, Purple, Pink, Brown, Light Blue, Dark Blue, Light Green, Dark Green, Silver and Gold.

B - Get some extra brushes. You should have two to three brushes of each kind: Flat 1" brush, Flat 3/4" brush, Round #3, Round #4, 1/2'' Filbert/Blending Brush. If you have a heavy hand, get at #1 round for your line work.
C - Get some extra sponges: you should have at least 20 to 30 half circle sponges and maybe some petal shaped sponges.
D - Get some wet wipes, q-tips, a black towel, dirty water bucket, trash can or trash bags, a mirror and a case to carry all of your supplies.
E - Make a display sign or word menu so people know what kind of designs you offer.
F - Get a nice table cloth that you can use to cover the table you are painting at to prevent staining it.
G - Get a light fold-able table (unless you request one at each event).
I - Get a tall director's chair and back strap or something similar so your customers can seat while you paint.
When choosing how to display your design options you should decide if you want to just use a word menu that will give you the flexibility of painting the designs in whichever way you feel comfortable that day, or if you want to have a display menu with actual pictures that showcase exactly how the design will look like. The first option will give you flexibility while the second one will allow guests to have a better idea of the outcome and will help you promote your skills. It may also be easier for you to copy an image there then come up with a design on the spot.
A word of caution when making a design board with actual images: always use your own images, or pictures of designs you created. If by any chance you got inspired by another artists when creating a design, give it a twist and make it your own before you take a picture and put it on a design board. Many artists are very protective of the hard work that went into creating a specific design and would rather other artists not use their designs to promote a different artist.

Don't just Google images and download them, those images belong to someone. It is best to paint yourself or your own kids or relatives and take pictures, or paint over a practice board and take pictures.
Also, watch out for copyrighted characters. Painting copyrighted characters can violate copyrights and put you at risk. We highly suggest you stay away from displaying pictures of characters that can be easily identified by the copyright owner. You can always create a similar design that gives the feel of the character without making it an exact copy and using the original's character name on your board. This is, of course, just our opinion based on what we have read and discussed with lawyers, the final decision is up to you.
What else you will need besides paint, and how to display your designs (what to do and what to avoid when coming up with designs and a display: copyrights, don't copy paste someone else's work, credit artists, use your own work, etc)
Welcome to the games! Now is the time to get those gigs booked and it is good to be prepared so there are no surprises.
Your website is up, you have been practicing like crazy, passing around business cards, maybe volunteered at a few events and you have finally been contacted by e-mail or phone about your services, so what now?
Either through e-mail or by phone, try and get as much information about the event as possible: when, where, at what time, how many people will they expect you to paint, how many people total will attend, who are you required to paint, what kind of event is it, is there a theme, are there any kinds of designs you are not allowed to paint, are there any special needs to be considered (allergies, guests with special needs, etc), how will they pay, how many hours they want you there, who will be your contact person, is it indoors or outdoors, will they cancel due to bad weather, will it be re scheduled then, will you need to bring your own table and chairs, will they provided a well lit well ventilated and properly heated/cooled area for you to paint at, where will you park, who pays for parking, will they need a certificate of insurance or be named as an additional insured, etc.
Once you have all of the information you need for the event it is time to send a quote. We always suggest to do that over e-mail to leave records of your conversations in case there is any doubts in the future as to what was agreed upon. Make sure your contract includes all of the event details and that your customer signs it and sends it back to you.
If you want the gig sometimes you might need to negotiate with your customer. Maybe offer to paint faster designs so you can paint more people per hour and stay less time so you can stay within their budget, or offer a discount if they book you for several hours. But only offer to do what you feel comfortable doing, so you don't regret it later. A lot of time those who haggle prices do it out of habit, not because they can't afford your regular rate.
This is the most exciting part! You should always secure a booking and set aside the date for that customer only after that customer has paid for your booking fee. Make sure to clarify that it is a booking fee that goes towards the total quoted, but that it is non refundable. This is because you have by now spent some time with that customer and even if the event gets cancelled, you should be paid for the work you have done so far. Some people require a 50% of the total as a booking fee, others use just 50% of the first hour cost, this is entirely up to you, but make it reasonable. Also, many painters offer the person a one time chance to change the date of the event for a date that you are available, at no extra charge, this way the customer doesn't loose their booking fee if he or she has to reschedule the event.
Once you get your booking fee paid for, you can mark that date and time off your calendar so you don't book any other event then. Make sure to also clarify how will the balance be paid for. Some want the balance paid on the date of the event upon arrival, others accept to get paid at the end of the event. Many painters are starting to require that the full balance is paid off 24 hours before the event, and others accept checks in the mail within 30 days (normal request for corporate events). We strongly suggest you try and get paid before you start painting. Finding the host in the middle of the party when you are done is hard, and by getting paid first you can make sure you get paid what was agreed on. You can even offer a discount if you are paid in advanced. Cash is your best option, since PayPal payment, Credit Card payments and checks can be declined or reversed afterwards. Most customers are great, but every now and then you might need to deal with someone a bit more tricky. Taking precautions is always best, but be flexible and learn to read the customer, as the flexibility might lead to future gigs.
Make sure your face painting kit is organized, clean and complete for your event. Make sure to order any special supplies you might need with enough time and that you double checked that all essential supplies are packed and ready to go. Arriving to your gig and realizing that you left your paint brushes on the kitchen counter at home is a real nightmare that you should avoid at all costs. Always double check.
Check with your customer 24 hours before the event that everything is still going on as planned. Often organizers change the time, or the date or location and forget to tell someone about it. So, making a call 24 hours before the event will give you piece of mind and re-assure your customer as well that you will show up.
Put the exact address on your GPS, GoogleMaps, Waze or whatever app you use to get to places and make sure that you can locate the place and that there are no detours needed due to road work, or any other things that might delay your trip the next day. Call you client if you have any issues finding the location, and get clear directions from them. Make sure that if you are meeting at a camp ground, city park or other large place that you know where they are going to be and perhaps what to look for like a red tent, a balloon arch, a tennis court etc.
On the day of your event load the kit in your car, go through your check list to make sure you have everything you need and drive to the event's location. If your kit is too heavy and parking is too far from the area you will be painting at, you might need help unloading or first unload near the area and then go and park your car as needed. Leave with enough time to do all of this extra leg work.
Find the host, introduce yourself and ask for directions as to where to set up and request the payment balance. It is best to find a way to check that the cash or checked received matches what was owed to you in front of your host but not in front of the guests, as that can kill the magic especially if done in front of little kids. You can suggest going into an area free of guests if you see little kids running around you.
If you are doing the event in costume, then make sure to arrive already dressed and to never handle money in front of kids while in costume, as no one wants to see a fairy, princess, elf or clown getting paid to be with the kids.
Now is time to set up. You should arrive to the location with enough time so that you are painting at the event at the time you were requested to start. If you have an overly cautious host that wants you to arrive a lot more time ahead of the start of the event than needed, then we suggest you convince your host that only so much time is needed to set up (usually 10 to 15 minutes) or you will have to bill them for the extra time they are requesting you to be there.

Set up your chair, your table with table cloth, your paints, brushes, sponges and glitter. Have your wipes and mirror at hand, make sure you have business cards around so people can take one if they like your work or give one to every kid if they have instructions on how to was the paint off. Make sure you have plenty of clean water available in a sturdy container and also a place to store used dirty water until the end of the event.
We strongly suggest you set up in a way that people in line can see what you are painting, that is a form of entertainment and will keep people distracted. Your kit should be set next to the person you are painting and in a way that it won't be easy to reach by the people waiting in line.
This is when the fun part begins! You get to be creative and have fun. Always talk to the person sitting in your chair. Ask them what design they want, ask them about their favorite color, you can also ask their name. Parents might want to choose for the kid, but you should confirm with the kid getting painted if that is what they want, and if they say something different try and find a polite way to convince the parent that you will paint what the kid wants, or find a compromise so parent and child can be happy.
Before you start painting make sure to ask about allergies. Also, if the person getting painted has a dirty face or they have a rash or wound in the area to be painted, then suggest a design on their arm or hand. Never make your guest feel bad about it, just say something like: you know what, you have an awesome looking arm, why don't we paint the design there? Or something of that nature.
Once you are done invite the guest to jump off the chair and give them a mirror so they can check themselves. If you have time, it is best to allow the guest to check the design while they are seated, but sometimes the line is too long and parents want to take 50 pictures, so you need the chair free for you to start painting your next guest. In this situation is best to give them the mirror once they are off your chair. Just make sure they don't run away with it :)
While you are painting, if you have a long line make sure to every now and then ask out loud for guests to start thinking what design they would like and what is their favorite color. That way they are ready to roll once they seat on your chair.
If you are painting at a birthday party normally you don't have to worry about too long of a line, but if you are working at an event with large crowds then you will need to find a way to manage your line. You can give numbers out, or have a line manager that goes with you to your event, or you can use an End of the Line Vest that you can give to the last guest in line. Make sure you keep in mind how many people you can paint in an hour and how many people are in line. If you have 30 minutes left to paint and you can paint 10 kids in an hour and your line already has 5 kids in it, then you should close your line so that by the time the 30 minutes have passed you are done and can pack up your kit.
If you are working at a large event we suggest that you have a sign with the posted hours that you will be there and the time you expect to close your line at. That way guests are not caught by surprise.
We are not going to lie to you, closing your line is about the hardest part of the job since it means that you might have to leave someone unpainted and might have to deal with disappointed parents and kids. It is a good option to have some cute stickers, balloons or something like that that you can give away for free to the few kids that might have ended up unpainted. If I am not in a huge rush, I usually keep a rainbow cake, brush and water out last, so that I can swipe a rainbow on the wrists of little kids if they come by and ask for something while I am cleaning up.
Your line is closed, everyone that could be painted has been painted, now it is time to pack up. Make sure to do this quickly, to prevent more people approaching you and asking you if you could paint one more face. Pack everything up, make sure you leave no trace behind and be ready to leave.
Try to find your host and thank them for the opportunity, say good bye and head home! When you get home make sure to remove your kit from the car right away because a car can get very hot and very cold and that could destroy your face paints. Also, unfortunately several painters have left their kit in the car only to find out that it was stolen. So, it is best to keep it safe at home :)

You are probably tired and you just want to rest, but cleaning your kit today will allow you to be ready for your next event and will prevent any bacteria or mold from developing due to dirty wipes, sponges, brushes or wet paint not stored properly.
Clean your brushes and sponges as explained earlier on this blog post, dispose of any trash and dirty water, wipe the surface of your cakes clean using a clean sponge and just a bit of water, let them fully dry and only then put the lids back on.
Wait a few days or so and e-mail your host, let them know how much fun you had at their event, what you enjoyed the most and ask them a few questions so that they know you care about your work and how you performed. Let them know that you would love to go back and to think of you for any other events they might have.

There a few things you want to avoid when booking events or while working at it.
Looking unprofessional: an unprofessional presentation, including your kit, clothing or overall attitude is a business killer. The way you present yourself says a lot about your business so always make sure to look your best, have a clean looking kit and have a smile on your face. Take a shower, brush your teeth and style your hair. Your outfit should be clean and have a professional look, avoiding any kind of logos or slogans that can be considered offensive. Talk with the the event organizer so that you know know if you should wear long pants, a dress, a pair of jeans or a costume. Trying to dress according to the occasion while keeping an overall professional look is key.
Being Confrontational: sometimes parents can be demanding or kids can get unruly. Most face painters have experienced uncomfortable situations while at events, especially when it is time to close the line. Unless you are in a situation that requires that you stand your ground, always try and avoid conflict, even in tricky situations. Remember, everyone else is watching and those are all potential customers. If you handle a complicated situation well you will get extra points in their book. Try to stay calm, friendly and look for help from the host or another adult if needed.
Being Late or Unprepared: always arrive on time and prepared. Have everything you need ready to go. If by any chance you are running late due to unforeseen circumstances, make sure to call your host, let them know and offer to stay later if you can, or offer a discount if you can't. I always expect a traffic delay so I leave earlier than needed and just take a little breather in my car if I show up to early.
Cancelling on an event: cancelling on an event should only be left as a last resource if nothing else can be done. Don't cancel on someone because you found a higher paying gig or because something else cam up that weekend. Instead, try and always stick to your word and if you have no other option, try to find a suitable replacement that you know will make you look good. Check with your host and make sure they are ok with that.
Working While you are Sick: if you are sick and people can tell, or you are contagious, then it is best to stay home. Everyone will appreciate that. Try and find a replacement and if you can't, offer your apologies, and maybe offer a discounted rate for a future date. Is not worth it to put other people's health at risk, to put your own health at risk, or to risk the image of your business by coughing and sneezing all over your customers. :)
Don't Smoke: if you are a smoker, make sure that you do not smoke while at your job, or right before your event as it is not good to smell like cigarettes when you are painting kids. Make sure to smell fresh but avoid strong perfumes as there are some people that are very sensitive to perfumes.
At some events guests might be inclined to tip you. If it is a private event and you are not sure if they gave you a tip or simply payed you more than agreed to by mistake, double check with your host. If someone hands you a tip, just politely take it and keep going with what you are doing. Of course, always make sure to thank them.
If you are at a large event, make sure your host is okay with you receiving tips. Some are okay with it so long as you don't have a tip jar and are openly asking for tips, others will ask you to refuse all tips, and some will let you have a tip jar and requests tips. Some might even negotiate a lower rate with you in exchange for allowing a tip jar to be placed on your table. Each event is different. If you are getting paid your full rate we suggest not to set up a tip jar as that might be seen as unprofessional. You can still take tips offered to you, but you are not asking for them.
Getting repeat bookings is a great way to stay booked most of the year. In order to do that it is important to follow all of the steps mentioned above.
If your customer has a pleasant experience and is left with good memories of your work, they are more likely to hire you and to recommend you to other event organizers, family members, etc.
Working with agents and networking with other artists is also a great way to get more bookings. Agents get plenty of work and they will offer you more opportunities if you do a good job representing them.
Other face painters in your area are also a great opportunity for more gigs. Everyone needs someone to cover a gig for them every now and then, or might need extra help at an event they can't manage on their own. Having a good networking group can bring you a lot of extra job opportunities.

Make sure to remember that you are a walking banner while you are painted, so give away business cards any time someone asks you who painted you, and at every event you attend no customer should leave without your card.
Follow also all of the steps we mentioned on point 5 and you should have plenty of bookings in a few months.
Don't forget to approach local restaurants. Many have kids nights or family days and they could use a face painter to help them bring in a larger crowd. You can read all about working with restaurants on our How to Run a Face Painting Business - How to Contact Restaurants blog post.
Every job has the potential for some issues to come up, the important thing is to be prepared and to know how to solve them in a professional way.
Customer did not pay: if you get to the event and the host is no where to be found, you have to decide between sticking to your word and start painting at the agreed time hoping to find the host later before you leave, or politely wait for the host to show up so that you can get paid and start to work. Sometimes you will find yourself facing a situation were the host pays you once you are done and they try and pay you less. You can politely reference your contract (always take a printed copy with you to your events) and request the difference. If the situation gets heated and the difference is not much, it might be best to just take a loss and walk out. This is up to you to decide.
Customer asks you to stay longer: many times the host did not calculate well how many people needed to get painted and they might ask you to stay longer. If you can, then you can say you would love to, and that your rate for extra time is so much. Make sure it is clear that you are not staying extra for free (unless is a large corporate event and you know a few extra minutes will make you look extra good). If you know in advance that you won't be able to stay longer because you have another event, then make sure to let the host know at the moment you get booked, or before the event starts.

Events Cancelled Without Notice: believe it or not, sometimes an event can be cancelled and they might forget to tell you. Calling to confirm the event 24 hours before is a good idea. If you have been fully paid for in advance, it is less likely that they will cancel on you without letting you know. If you haven't even gotten a booking fee paid for, then the chances for a cancelled event increase. Make sure your contract indicates what happen if they cancel, how far in advance they need to let you know and what percentage of their payment will be returned in case of a cancellation.
Event is Cancelled due to Inclement Weather: weather is unpredictable but what happens when there is bad weather can be stipulated on your contract so that you know the outcome and your customer knows as well. Make sure you have clear policies in place and that your client is aware.
Price Shoppers: very frequently you might find a person trying to get the cheapest price possible and they might ask you if you can match another painter's rate, or charge a specific amount that fits their budget. Our suggestion is to simply thank the person for considering your services but explain that your rates are set based on your specific service based on quality, speed and products used and that you will be glad to work with them at a future event if they have a budget for you. Don't go on long emails back and forward as to why you are worth it or why they are being too cheap. It won't make them change their mind and you might risk looking unprofessional.
Issues Managing the Line: as mentioned before closing the line can be tricky.
If you are painting at a birthday party normally you don't have to worry about too long of a line, but if you are working at an event with large crowds then you will need to find a way to manage your line. You can give numbers out, or have a line manager that goes with you to your event, or you can use an End of the Line Vest that you can give to the last guest in line. Make sure you keep in mind how many people you can paint in an hour and how many people are in line. If you have 30 minutes left to paint and you can paint 10 kids in an hour and your line already has 5 kids in it, then you should close your line so that by the time the 30 minutes have passed you are done and can pack up your kit.
If you are working at a large event we suggest that you have a sign with the posted hours that you will be there and the time you expect to close your line at. That way guests are not caught by surprise.
We are not going to lie to you, closing your line is about the hardest part of the job since it means that you might have to leave someone unpainted and might have to deal with disappointed parents and kids. It is a good option to have some cute stickers, balloons or something like that that you can give away for free to the few kids that might have ended up unpainted.
Impolite or Misbehaving Guests: there is a difference here if we are talking about kids or adults. You can expect for kids to misbehave and boundaries should be set while keeping a professional attitude. If a specific kid is out of control you might want to ask for help from another adult at the party.
If the ones misbehaving are adults, then you need to know your limits. If you feel you are at risk, or you are being treated in a disrespectful way, you are always welcome to walk out of the event. Always make sure that you take the approach that will be safer for you. You don't have to endure humiliation or harassment just because they are paying for your work. This does not happen often at all, but every now and then you might find that an adult that drank a little too much might create a scene or make you uncomfortable, most of the time someone else will notice, take care of the situation and you will be able to continue painting.
Overly High Booth Fees: many festivals offer you a chance to participate on their event and charge per guest getting painted in exchange for a booth fee. Some festivals are well worth your time and investment while others are not. Sometimes is a toss up. The best way to prevent loosing money is to negotiate a percentage of your sales rather than a flat fee in advance. Some will agree to that, others won't. Do your research, talk with other painters and see if it is worth it. If the fee is to high and the crowd is small or too many painters are painting at the same festival, you might loose money. Also, ask the organizer what happens with your fee if the event gets cancelled.
Like with any job, face painting requires that you continue your education year after year to get better, learn about new products and trends, expand your services and more.
We will go over some opportunities the market has to offer to improve your skills.
YouTube has endless video tutorials with step by steps to paint specific designs and product reviews. Make sure to check our own YouTube channel at YouTube.com/JestPaint

There are several blogs out there with tons of step by steps and products reviews. We have one of the most complete and detailed blogs available right now with professional reviews, images, videos and free documents to download. You are inside our Jest Paint blog right now, so you know how much information you can find here.
If you have not dived into Pinterest yet, we highly suggest you do it right away! There are many great things in there! We have a great Pinterest page with many useful boards for you to check: Jest Paint's Pinterest Page.
Facebook is a great place to interact with other face and body artists and learn from more experience artists. There hundreds of groups but these are the ones we recommend for you to join:
Something to keep in mind when posting pictures online. It is ok to be inspired by other artists and to try and replicate their designs for fun and for practice; just make sure to give credit to the original artist. If you like a picture and you save it, add the name of the artist to the file's name so you can remember who to credit when you post your own version of it.
If you haven't heard of a jam, you should start asking around. It is very common for painters in a city to get together every so often to do a jam. This is a time for painters to get together, eat something and practice face painting. They share ideas and tricks with each other, talk about new products or business things, etc. They sometimes bring instructors to the jams as well.
Think of conventions as an extended jam. Here you will have scheduled classes that can go from private classes with just a few students to massive classes with up to 100 students at once. You will meet great accomplished artists/instructors and get to hang out with them and other painters. Conventions are a lot of fun and you can learn a lot if you take it seriously. Plus, you get to travel and have some fun too! Conventions usually include games, gala dinners, and awesome vendor rooms were you can shop for items from all the different brands all in one place! You can see the items, touch them, test them and you get to ask a lot of questions as well.
Last, but certainly not least is Olga's online International Face Painting School. If you are looking for the ultimate learning experience, with very detailed step by steps, clear directions, personalized coaching, progress exams and an incredible amount of material that you can always go back to, then we strongly suggest you take a look at the International Face Painting School.

Olga's school is a proven success and it has a clear method designed for you to learn from A through Z in an organized matter. These are not just random classes in a library, these are specially organized lessons that will build upon the previous one to give you the best face painting course you could ever wish for.
Jest Paint Academy is a ala carte video class collection created by Anna and Santi from Jest Paint. New classes will be released in 2025. There are also classes on business and marketing! Learn basics if you have never face painted before, learn tricks for using rainbow cakes, stencil and more! You will also find some classes on full face designs. These are not sped up like more videos you will find online for free. They are affordable and you can watch them over and over. Click the link above to learn more!
We think we have given you a great overview on how to become a professional face painter. Hopefully now you are ready to expand your services and reach an even larger market. Here are a few things you can consider to do with some links that have extra information:

We have tons of Glitter Tattoo Kits Here ! These sparkly designs are popular with kids, adults teenagers. They are water resistant and can last a few days, up to a week!

The designs above were done with Art Factory Henna Lace, which is mix of face paint and body glue. You can set it with glitter for a sparkling henna effect. It lasts a day or two and is removed with oil or alcohol.

In 2025 we said goodbye to Qualatex and said Hello! to Sempertex Balloons at Jest Paint.

We have tons of mylar stencils and long lasting paints for temporary tattoos!


Click to see GTX Water Resistant Cream Paints. You can paint kids who might get wet at a pool party. As long as they don't rub the paint, the water will bead off and they will look great!
We will be writing more about each of those additional services so you can continue to learn from us :)
If you like this post please feel free to: Share it with others, comment bellow and most importantly, subscribe using the subscription box below so that you can get e-mail alerts when new blog posts are published.
Comments
Leave a comment